Dryer Not Heating on Timed Dry? Step-by-Step Troubleshooting Guide
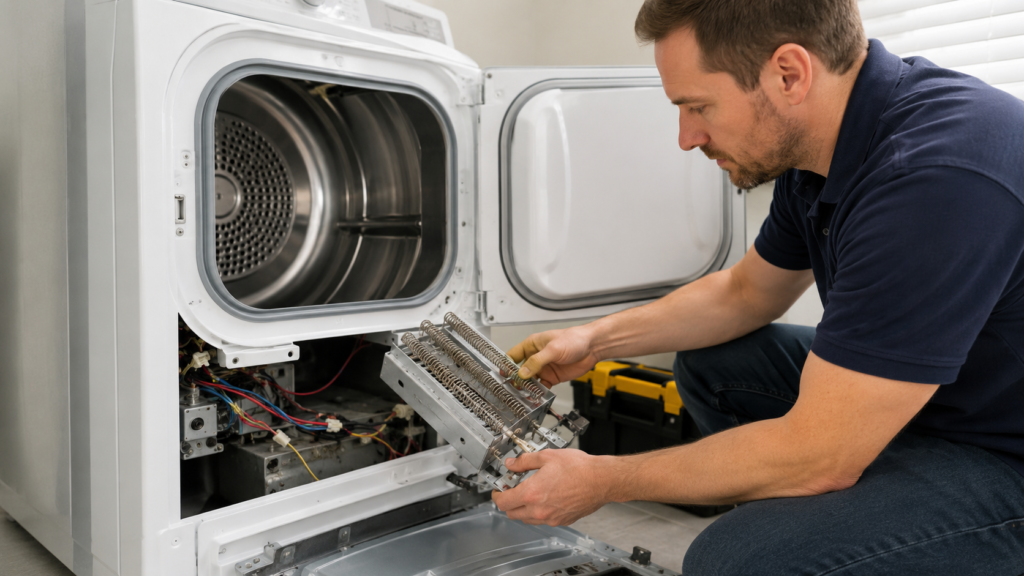
A dryer not heating on timed dry is almost always caused by one of three things: a blocked vent, a blown thermal fuse, or a failed heating element. not a bad timer setting. The drum keeps spinning because the motor circuit and the heating circuit run separately, so a machine that tumbles but never warms up is actually giving you a clear diagnostic clue. Work through the checks below in order, and you’ll usually pinpoint the cause before you ever need to call a repair tech
Quick Answer: What Usually Causes It
In most cases, a dryer not heating on timed dry comes down to restricted airflow, a tripped breaker, a blown thermal fuse, or a worn heating element. Less often, the problem traces back to a failed thermostat, a bad gas igniter, or a worn timer motor. Checking these in order. cheapest and easiest first. will solve the issue for most homeowners without a service call.
Why Timed Dry Shows the Problem First
Timed Dry runs on a fixed countdown. It doesn’t lean on a moisture sensor to decide when the load is done, so there’s no sensing logic to blame when the heat doesn’t show up. That’s actually good news for troubleshooting. it points you straight at the heating circuit instead of the electronics.
Here’s a diagnostic shortcut worth trying before you touch a screwdriver: run a short Auto Dry cycle and see whether you get heat there. If Auto Dry warms up fine but timed dry doesn’t, you’re probably dealing with a worn timer motor, a failing selector switch, or a wiring fault tied specifically to that cycle. But if there’s no heat on any setting. timed dry included. you’re more likely looking at a shared component failure, such as a blown thermal fuse, a burned-out heating element, or a tripped breaker. That one five-minute test can save you an entire afternoon of guesswork.
Start With the Basics: Power, Vent, and Settings
Before assuming something’s broken, rule out the simple stuff first. It sounds obvious, but a surprising number of “no heat” complaints trace back to something fixable in under two minutes.
- Check your circuit breaker. Electric dryers pull 240 volts, and most models split that power across two separate breakers. one for the motor, one for the heating element. If only the heating leg trips, your dryer will tumble normally and still feel stone cold. Flip both breakers fully off, then back on, since a partially tripped breaker can look normal at a glance.
- Confirm the gas valve is open on gas models. The valve handle should sit parallel to the gas line. If it’s turned perpendicular, the drum will spin but the burner won’t fire.
- Double-check your cycle selection. Some dryers place an “Air Fluff” or no-heat option right next to the timed settings, and it’s easy to select by mistake.
- Clean the lint screen and inspect the vent. A clogged vent doesn’t just slow drying. trapped heat builds up inside the cabinet until safety components cut the heater off completely. Pull the screen, clear it by hand, then disconnect the exhaust hose at the back of the dryer to check for buildup.
If all of that checks out and you still have a dryer not heating on timed dry, it’s time to move on to the internal components
⚠ Important Safety Notice
Always disconnect electrical power before removing dryer panels or testing internal components. For gas dryers, shut off the gas supply valve before servicing the appliance. Never bypass a thermal fuse, high-limit thermostat, or any other safety device, as doing so can create a serious fire hazard and damage the dryer.
- Unplug the dryer before opening the cabinet.
- Use an insulated multimeter for continuity testing.
- Allow heating components to cool completely before touching them.
- Replace failed safety parts only with compatible manufacturer-approved replacements.
The Thermal Fuse Is the Most Common Culprit

If power and airflow both check out, test the thermal fuse next. This small safety device is designed to permanently blow if internal temperatures climb too high, cutting power to the heating circuit before things become a fire risk. Once it’s blown, it stays blown .there’s no reset button, and that’s by design.
Thermal fuses rarely fail on their own. They blow because something restricted airflow long enough for heat to build up: a clogged vent, a crushed hose behind the dryer, or months of lint packed inside the ductwork. That’s exactly why replacing a blown fuse without also clearing the vent path is a losing strategy. The new fuse often blows again within weeks, and homeowners end up right back where they started with a dryer not heating on timed dry.
To test it, unplug the dryer first. always. The fuse is typically mounted on the blower housing or near the heating element, depending on your model. Set a multimeter to continuity mode: a healthy fuse shows continuity, and a blown one reads open. If it’s blown, replace it and clean the entire vent run while everything’s already apart.
Symptoms of a blown thermal fuse:
- Dryer tumbles normally but produces zero heat
- No error code on most standard models
- Vent or lint screen is noticeably clogged
- Cabinet feels unusually warm to the touch during a cycle
Heating Element Failure

If the thermal fuse tests fine, the heating element is the next likely suspect. In an electric dryer, this is a coiled wire assembly that generates heat as current passes through it, similar in principle to a toaster element. Years of heating and cooling cycles eventually cause the coil to crack or burn out, often right at a connection point where it takes the most stress.
The tricky part is that a failed element doesn’t always look damaged. Sometimes the coil looks perfectly intact but has a hairline break that only shows up under a continuity test. With the dryer unplugged and the rear or bottom access panel removed, test the element with a multimeter. most healthy elements read somewhere between 8 and 50 ohms depending on wattage. A reading of infinite resistance (OL) means the element has failed and needs replacing.
Gas dryers skip the coiled element entirely and rely on a gas valve, igniter, and flame sensor instead. If your gas dryer runs but never heats, a failing igniter that glows but doesn’t get hot enough to trigger the gas valve solenoids is a common cause of a dryer not heating on timed dry in gas models
You May Also Like
If your dryer is not heating on the Timed Dry cycle, these related FixAppLab troubleshooting guides can help you diagnose heating problems, timer issues, airflow restrictions, and other common dryer failures.
Thermostats: Cycling and High-Limit

Dryers rely on more than one thermostat to manage heat. The cycling thermostat switches the heating element on and off to hold a steady internal temperature, while the high-limit thermostat acts purely as a safety backup, shutting off heat if things climb dangerously high.
If the cycling thermostat fails in the open position, it never lets power through to the heater. which produces exactly the symptom you’re dealing with: a dryer that tumbles but stays cold on timed dry, and usually on every other cycle too. Both thermostats are inexpensive and simple to test with a multimeter for continuity at room temperature; a working thermostat should show continuity when cool.
Timer Motor and Selector Switch
Since timed drying depends on the internal timer motor to advance the cycle and keep the heating circuit connected, a worn timer motor can be the exact reason heat disappears on this setting while other cycles keep working fine. These motors run on small internal gears that wear down after years of daily use, and once they start slipping, they can lose the ability to hold the heating contacts closed.
The selector switch. the dial or button you use to choose timed dry in the first place. can develop the same kind of wear. Worn internal contacts show up more often on older machines that have logged thousands of cycles. A continuity test across the switch terminals, done with the dryer unplugged, will tell you whether that’s the weak link behind your dryer not heating on timed dry.
Don’t Overlook Restricted Airflow

It’s worth circling back to venting, because restricted airflow is the single most overlooked cause of a dryer not heating on timed dry. and the leading reason repairs don’t stick. Replace a thermal fuse or heating element without addressing airflow, and there’s a good chance you’ll be back in the same spot within a few months. Lint packed inside the duct, a bird’s nest in the exterior vent cap, and crushed flexible hose behind the machine are all common offenders.
A quick way to check: run the dryer for about ten minutes, then step outside and feel the exhaust vent. You should feel strong, warm airflow pushing out. If it’s weak or barely noticeable, the venting needs a proper cleaning. a vent brush kit handles most homes, though a professional dryer vent cleaning service is worth it if you can’t remember the last time yours was done.
Learn More About Dryer Vent Safety
Proper airflow is essential for dryer performance and fire safety. For additional recommendations on dryer maintenance and vent safety, visit the U.S. Consumer Product Safety Commission .
Common Mistakes That Make the Problem Worse

A few habits tend to turn a simple fix into a repeat repair:
- Bypassing the thermal fuse instead of replacing it. This removes a fire-safety feature and is never worth the shortcut.
- Replacing parts without checking airflow first. A new heating element or fuse installed on a still-clogged vent usually fails again quickly.
- Ignoring a burning smell or repeated breaker trips. These are warning signs, not something to run through a few more cycles and hope it clears up.
- Skipping annual vent cleaning. Most dryer not heating on timed dry complaints trace back, at least partly, to airflow that’s been neglected for a year or more.
Step-by-Step Troubleshooting Order
Working through checks in the cheapest, easiest-first order saves both time and unnecessary parts purchases:
- Clean the lint filter
- Check the exhaust vent for airflow outside
- Reset the circuit breaker (both legs, for electric models)
- Confirm the gas valve is open (gas dryers)
- Test the thermal fuse
- Test the heating element
- Test the cycling and high-limit thermostats
- Check the timer motor and selector switch
- For gas dryers, inspect the igniter and gas valve coils
Repair or Replace?
Most fixes for a dryer not heating on timed dry are inexpensive. a thermal fuse or a heating element typically costs far less than a service call, let alone a new machine. Repair almost always makes sense if your dryer is under 10 years old and the issue is isolated to one component.
Replacement starts to make more sense when the dryer is older, has needed multiple repairs already, or when the estimated repair cost creeps close to half the price of a new unit. If you’re on the fence, get a quick diagnosis from a technician before deciding. sometimes what looks like a major failure turns out to be a five-dollar fuse
Prevent Future Dryer Heating Problems
Regular maintenance can significantly reduce the chances of your dryer not heating on Timed Dry and help extend the life of the heating element, thermal fuse, and other important components.
- Clean the lint screen after every drying cycle.
- Inspect and clean the entire dryer vent system at least once every 12 months.
- Keep the exhaust duct as short and straight as possible for better airflow.
- Avoid overloading the dryer, which restricts airflow and increases drying time.
- Replace crushed or damaged vent hoses immediately.
- Watch for longer drying times, burning smells, or weak airflow—these are early warning signs that maintenance is needed.
If your dryer suddenly starts taking longer to dry clothes, don’t ignore it. Reduced airflow is often the first sign of a developing vent blockage and is one of the leading causes of thermal fuse failure and heating element damage.
When It’s Time to Call a Professional
Most of what’s covered here. lint traps, thermal fuses, heating elements, thermostats. is within reach for anyone comfortable using a multimeter and following basic safety steps like unplugging the unit before opening it up. But if your troubleshooting points toward the gas valve assembly, the control board, or wiring you’re not confident handling around a 240-volt circuit, bring in a licensed appliance technician. Gas components in particular carry real risk if mishandled, and a professional can usually isolate the exact fault faster with dedicated diagnostic tools.
A quick safety note: always unplug your dryer (or shut off the gas supply and breaker) before removing any panel, and never bypass a thermal fuse or high-limit thermostat just to get the machine running again. those parts exist to prevent a fire.
Getting a dryer not heating on timed dry back to normal almost always comes down to working the problem in order: confirm power, check the vent, test the thermal fuse, check the heating element or igniter, verify the thermostats, and rule out the timer or selector switch. Handle the easy checks first, keep your vent clean going forward, and in most cases you’ll solve it without paying for a single part you didn’t actually need.
Final Thoughts
If your dryer not heating on Timed Dry problem is caused by a clogged vent, blown thermal fuse, faulty heating element, bad thermostat, or timer issue, following the troubleshooting steps in this guide can help restore proper heating quickly. Regular dryer maintenance and annual vent cleaning can also prevent future heating problems and improve drying performance.


Comments