Dryer Vent Cleaning: How to Clean a Dryer Vent Safely (Complete Guide)
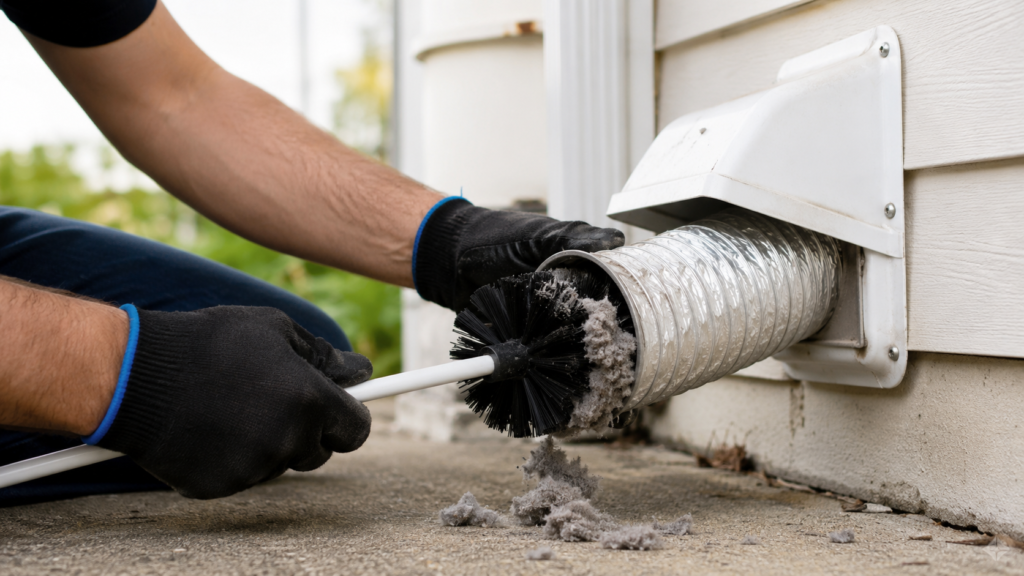
Dryer vent cleaning is one of the most important maintenance jobs a homeowner can do, and yes, it’s something most people can safely handle themselves in under two hours. Lint that builds up inside the exhaust duct restricts airflow, forces the dryer to work harder, and creates a real fire risk if it’s ignored for too long. This guide covers why dryer vent cleaning matters, how to spot the warning signs, and how to clean the vent step by step from both the inside and outside of your home
Quick Key Takeaways
- Clean the lint screen after every load.
- Inspect and clean the dryer vent at least once a year.
- Long drying times usually indicate restricted airflow.
- A clogged vent increases energy use and fire risk.
- Use rigid metal ducting whenever possible for better airflow.
- Always disconnect power before cleaning the vent system.
Table of Contents
Why Dryer Vent Cleaning Matters More Than Most People Think
Every time you run a load through the dryer, warm, moist air carries tiny lint particles out through the exhaust duct. The lint screen catches most of it, but never all of it. Over months of regular use, the leftover lint settles inside the duct walls and slowly narrows the passage the air has to move through.
Once that passage gets tight, the dryer has to push harder to move the same amount of air. The motor runs longer, the heating element stays on longer trying to compensate, and every internal part runs hotter than it was designed to. That extra strain adds up over time and can shorten the life of components like the thermal fuse, the thermostat, and even the drum bearings.
There’s also a safety side to this that goes beyond simple performance. Lint is highly flammable, and a dryer vent packed with lint sitting right next to a heating element is one of the more common causes of appliance-related house fires. Routine dryer vent cleaning isn’t just about drying clothes faster. it’s a basic fire prevention step that a lot of homeowners never think about until something goes wrong.
Signs Your Dryer Vent Needs Cleaning
You don’t have to wait for a total blockage before scheduling dryer vent cleaning. A few warning signs usually show up well before things get serious.
The most obvious one is drying time. If a load that used to finish in a single 40-minute cycle now needs 60 or 90 minutes, or needs a second full cycle just to finish drying, that’s a strong sign the vent is restricted.
Heat is another clue. Dryers naturally warm up during a cycle, but if the top panel, the front of the machine, or the laundry room itself feels noticeably hotter than usual, that heat isn’t escaping the way it should. A burning smell is a more urgent version of the same problem and should never be brushed off. if you notice one, stop the dryer and check the vent right away.
A few other signs worth watching for:
- Clothes come out hot but still damp, which usually means heat is building up while moisture isn’t being carried away fast enough
- The laundry room feels unusually warm or humid while the dryer runs
- The exterior vent flap barely moves or doesn’t open all the way when the dryer is on
- Visible lint collects around the outside vent hood or behind the dryer itself
Any one of these on its own is worth a look. A few of them together usually means it’s time for a full dryer vent cleaning. not just a quick wipe of the lint screen.
What to Check First
Before you pull the dryer away from the wall, it helps to rule out the easy stuff. Start with the lint screen itself .if it’s coated in a filmy residue from fabric softener sheets, airflow can suffer even with a clear vent. Next, look behind the dryer for an obviously crushed or kinked hose, since that alone can mimic the symptoms of a clogged duct. If both of those check out and drying times are still off, it’s a good bet that dryer vent cleaning. is overdue
Dryer Vent Cleaning vs. Lint Trap Cleaning

These two jobs get confused a lot, but they’re not the same thing. The lint screen or lint trap sits right inside the dryer and should be cleaned after every single load. it catches lint before it ever reaches the exhaust duct.
Dryer vent cleaning. is a different, less frequent job. It deals with the lint that slips past the screen and gradually builds up further down the line, inside the actual duct that runs from the back of the dryer to the outside of your house. A dryer can have a spotless lint trap and still have a badly clogged exhaust vent, so cleaning the screen regularly doesn’t replace the need for dryer vent cleaning .on its own schedule
⚠ Safety Note
Before beginning any dryer vent cleaning, unplug the dryer from the electrical outlet. If you have a gas dryer, turn off the gas supply valve before disconnecting the exhaust duct. Wear gloves to protect your hands from sharp metal edges, and avoid operating the dryer until every vent connection has been securely reattached.
How to Clean a Dryer Vent Step by Step
Dryer vent cleaning .is a manageable weekend task as long as you have the right tools on hand and a second person to help move the appliance. Before you start anything, unplug the dryer, and for gas models, shut off the gas valve as well.
Step 1: Move the Dryer Away From the Wall
Get help moving the dryer roughly a foot away from the wall so you have room to work. Move it slowly and avoid crushing or sharply bending the exhaust hose as you go. a kinked duct can undo a lot of your cleaning effort by restricting airflow all over again.
Step 2: Disconnect the Exhaust Duct
Loosen the clamp or tape holding the duct to the back of the dryer and gently pull it free. If it’s been a while since your last dryer vent cleaning. don’t be surprised to find a thick clump of lint sitting right at the connection point.
Step 3: Clean the Vent Opening and Interior Duct

Vacuum out the exhaust opening on the back of the dryer and the immediate area behind it. For the duct itself, a dryer vent cleaning kit .with flexible rods and a brush head does the best job of reaching deep inside. These kits typically connect to a power drill. always rotate clockwise only, since spinning counterclockwise can cause the rod sections to unscrew and get stuck inside the pipe.
Work the brush slowly through the length of the duct, following any bends, then follow up with a vacuum hose to pull out the loosened debris. A shop vac with strong suction tends to outperform a standard household vacuum for this part of the job
You May Also Like
If you’re cleaning your dryer vent, these related dryer troubleshooting guides can help you diagnose other common problems faster:
Step 4: Clean the Exterior Vent
Head outside and remove the cover on the exterior vent hood. Clear out any lint, dust, leaves, or nesting material by hand or with the brush, then check that the flap swings open freely .a flap that’s stuck or barely moves usually means there’s still a blockage somewhere nearby.
Step 5: Reconnect and Test
Reattach the duct securely to the back of the dryer, making sure it isn’t crushed or kinked, then push the appliance back into place. Plug it back in, turn the gas valve back on if applicable, and run the dryer on an air-only or air-fluff setting for about 15 minutes. Strong, steady airflow at the exterior vent is a good sign your dryer vent cleaning .job is done right.
Common Mistakes to Avoid
A few habits can quietly undermine an otherwise solid dryer vent cleaning. job. Using a household vacuum with weak suction instead of a shop vac often leaves compacted lint behind. Spinning a drill-powered brush counterclockwise can cause the rod sections to separate and get stuck inside the duct, turning a simple job into a bigger repair. And reconnecting the duct with it kinked or crushed against the wall undoes the benefit of the cleaning almost immediately, since airflow gets restricted all over again right where you just cleared it.
How Often You Should Clean a Dryer Vent
Most households get by with dryer vent cleaning .once a year, though several factors can shorten that timeline. Larger families running multiple loads a day will build up lint faster than someone doing laundry once or twice a week. Homes with pets tend to need more frequent cleaning too, since pet hair mixes with lint and forms denser clogs.
The length and layout of your ductwork matters as well. Longer duct runs, more bends, and vents that travel a greater distance to reach an exterior wall all give lint more opportunities to collect along the way. Rather than sticking strictly to a calendar, pay attention to drying performance. if a normal load suddenly starts taking noticeably longer, that’s your cue to schedule another round of dryer vent cleaning. regardless of when it was last done
Prevention Tips
- Clean the lint filter after every drying cycle.
- Inspect the exterior vent hood several times each year for leaves, lint, or nests.
- Avoid crushing the vent hose when moving the dryer back into place.
- Replace damaged plastic or foil ducts with rigid or semi-rigid metal ducting.
- Watch for changes in drying time, unusual heat, or burning odors.
- Schedule annual vent cleaning even if no obvious problems appear.

Common Causes of Vent Blockage
Lint is the main culprit behind a clogged dryer vent, but a few other factors make blockages worse. Too many bends in the ductwork give lint more surfaces to catch on. A duct that’s crushed or kinked behind the dryer narrows the opening air has to pass through, even before lint enters the picture. Long vent runs simply give lint more distance to travel and settle along the way, and a blocked exterior vent cover. often from leaves, dirt, or even a bird’s nest. can undo all the cleaning you’ve done on the inside.
Using flexible foil or plastic ducting instead of rigid metal duct also makes blockages more likely, since these materials tend to sag and collapse over time, creating low spots where lint collects.
When to Call a Professional
Basic dryer vent cleaning. is manageable for most homeowners when the duct run is short and easy to reach. But some setups call for professional help .vents that run through multiple floors, travel long distances, or have several tight bends can be difficult to fully clear with consumer-grade tools alone.
If you notice a persistent burning smell, visible scorch marks near the dryer, or airflow that’s still weak after a thorough DIY cleaning, it’s worth bringing in a professional rather than continuing to run the appliance. A professional vent cleaning service costs far less than dealing with a house fire or a burned-out dryer motor down the line
Protecting Your Dryer and Your Home
Dryer vent cleaning .doesn’t get nearly as much attention as other home maintenance tasks, but it directly affects two things that matter a lot: safety and how long your appliance lasts. A dryer that vents properly runs cooler, works less to dry each load, and puts less strain on its internal components over time.
Building a habit of checking the vent system once a year, cleaning the lint screen after every load, and paying attention to drying times in between deep cleanings is one of the simplest ways to protect both your appliance and your home. It’s a small amount of maintenance for the peace of mind it buys you. and a lot cheaper than the alternative of a damaged dryer or worse.


Comments