How to Fix a Squeaking Dryer: Start by Finding the Noise
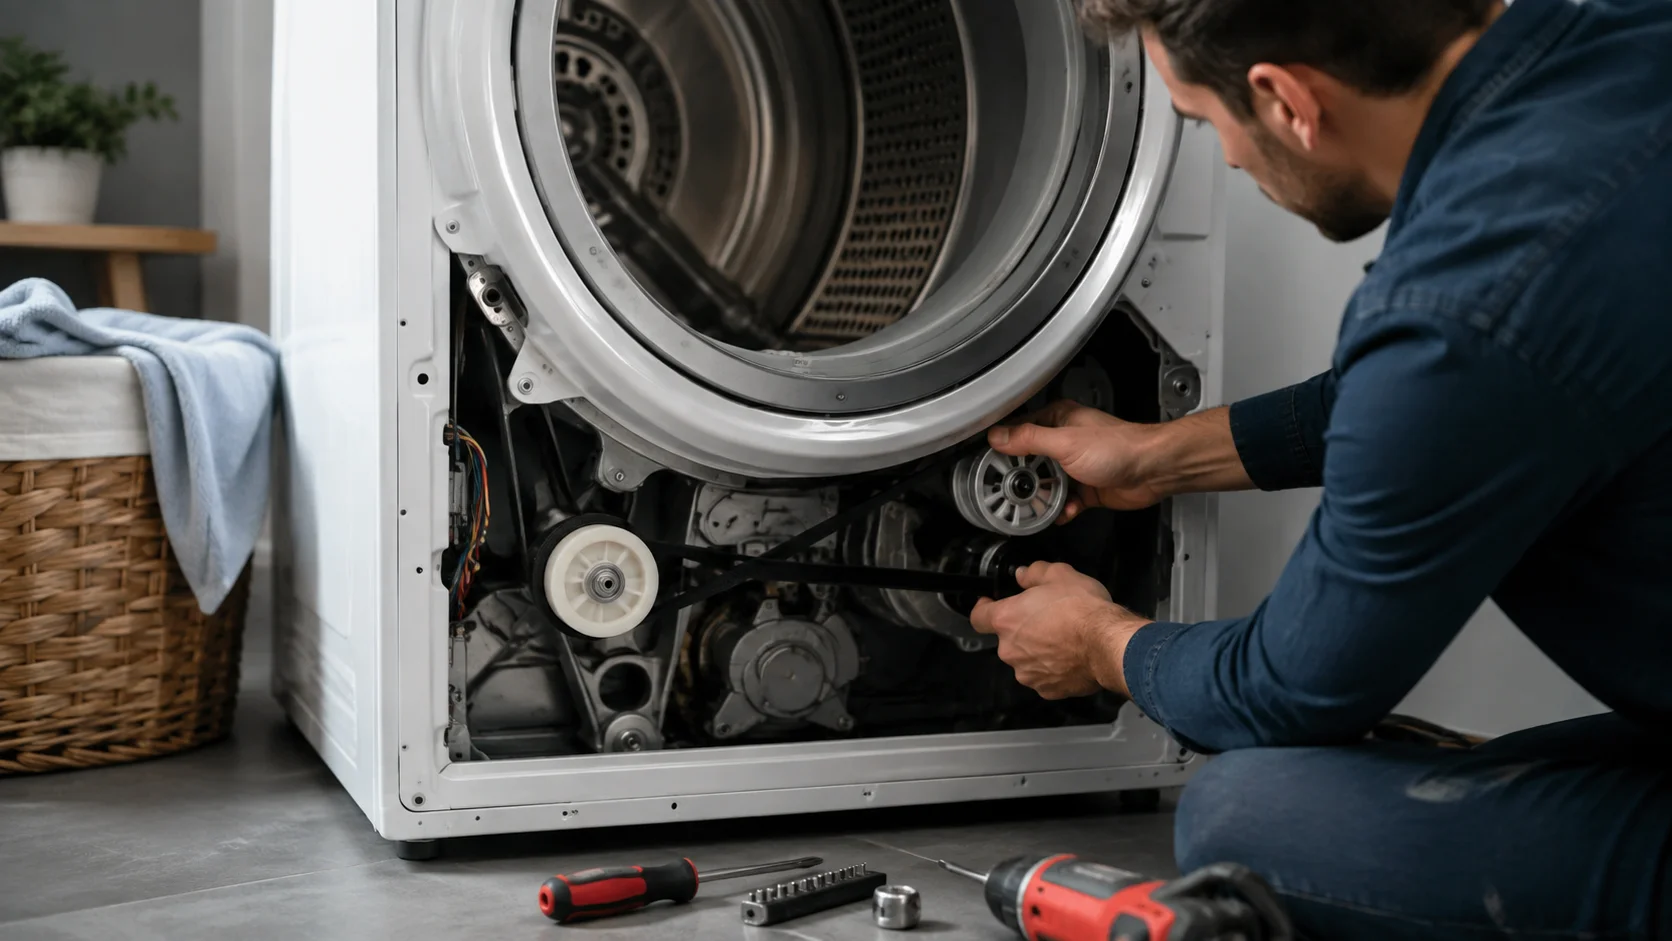
Yes, a squeaking dryer can almost always be fixed at home without calling in a repair company. In most cases, the noise comes from one of a small handful of worn parts around the drum, and once you know where to look, fixing a squeaking dryer usually takes an afternoon and a modest parts bill. This guide walks through exactly how to find the cause and solve it step by step.
Quick Key Takeaways
If you are trying to figure out how to fix a squeaking dryer, start by identifying where the noise is coming from. Most dryer squeaking problems are caused by worn moving parts that can often be inspected and replaced without replacing the entire appliance.
- Drum support rollers are a common cause of rhythmic squeaking that follows the drum as it rotates.
- An idler pulley may squeak or squeal when its bearing becomes dry, worn, or difficult to spin.
- A damaged drive belt can cause chirping, squealing, or slipping noises during operation.
- Rear drum bearings, glides, and felt seals can also create squeaking or scraping sounds as they wear down.
- Always unplug the dryer before opening panels or inspecting internal components.
- Fixing the problem early can prevent additional damage and help avoid a more expensive dryer repair later.
Table of Contents
Quick Answer: What’s Making Your Dryer Squeak?
Before diving into the full walkthrough, here’s the short version. A squeaking dryer is typically caused by one of these:
- Worn or dry drum support rollers
- A dried-out or seized idler pulley
- A cracked, glazed, or loose drive belt
- A worn rear drum bearing
- Damaged drum glides or felt seals
- An unlevel dryer or loose cabinet feet
- Lint buildup or a trapped object near the drum
If you only remember one thing from this article, remember this: the location of the squeak (front, back, top, or underneath) tells you almost exactly which part to inspect first.
Why Is My Dryer Squeaking When Spinning?
A dryer depends on several small moving parts working together every time you run a load. The drum needs to spin freely, the belt needs to stay tensioned, and a handful of support pieces need to carry the drum’s weight without ever letting metal grind against metal.
Over years of regular use, these parts dry out, wear down, or shift slightly out of position. That’s when you start hearing the squeak. A squeaking dryer isn’t usually a sign of a serious mechanical failure — it’s simply friction where there shouldn’t be any.
Common causes of a squeaking dryer include
- Worn or dry drum support rollers
- A seized or dry idler pulley
- A cracked, glazed, or loose drive belt
- A worn rear drum bearing
- Damaged drum glides or felt seals near the front of the drum
- An unlevel or loose dryer cabinet
- Lint buildup or a small object caught near the drum
- A worn blower wheel or loose motor mount
Not every squeaking dryer has the same root cause, so the real trick is narrowing things down before you start removing panels.
Start by Listening: Where Is the Noise Coming From?

Before opening anything up, run the dryer for a minute or two — it’s fine to run it empty — and pay attention to where the sound seems loudest. This one step alone saves a lot of guesswork later.
- Noise from the top or drum area often points to the drive belt or drum glides.
- Noise from the front-bottom is frequently the idler pulley.
- Noise from the back usually means the drum rollers or the rear bearing.
- Noise from underneath can be the blower wheel or a loose motor mount.
You can also unplug the dryer, open the door, and slowly turn the drum by hand. If the same squeak shows up while you’re rotating it manually, you’ve confirmed the problem is mechanical rather than electrical — which narrows your search considerably and rules out the motor or control board as the culprit.
Quick Troubleshooting Guide for a Squeaking Dryer
| What You Hear | Possible Cause | What to Check |
|---|---|---|
| Rhythmic squeak with every drum rotation | Worn drum support rollers | Spin the rollers by hand and check for stiffness, wobbling, flat spots, or unusual resistance. |
| Sharp squeak near the front-bottom area | Dry or worn idler pulley | Release the belt and check whether the pulley spins smoothly and quietly. |
| Chirping or squealing that changes while drying | Worn or glazed drive belt | Inspect the belt for cracks, fraying, glazing, looseness, or visible damage. |
| Squeaking from the rear center of the dryer | Rear drum bearing | Check for excessive drum movement, wear around the bearing, or rough rotation. |
| Inconsistent squeaking with cabinet movement | Unlevel dryer or loose cabinet parts | Check the leveling feet, cabinet screws, panels, brackets, and mounting points. |
Safety Note Before You Fix a Squeaking Dryer
Before attempting to fix a squeaking dryer, make sure the appliance is completely disconnected from power. Many of the repairs in this guide require removing exterior panels and working near moving parts, electrical wiring, and the dryer drum.
- Unplug the dryer before removing the top, front, rear, or access panels.
- Allow the dryer to cool completely if it has recently been used.
- Keep screws, clips, and small components organized during disassembly.
- Never operate the dryer while safety panels or protective guards are removed.
- Avoid spraying flammable lubricants or household oils inside the dryer cabinet.
- For a gas dryer, do not disturb the gas connection unless you understand the proper safety procedures.
Step 1: Check That the Dryer Is Level

It sounds too simple to matter, but an unlevel dryer is a surprisingly common cause of a squeaking dryer. When the cabinet rocks even slightly during a cycle, internal parts shift and rub against surfaces they weren’t designed to touch.
Place a level on top of the dryer and check it front-to-back and side-to-side. Adjust the leveling legs until the bubble reads even on both axes. If the dryer is already level but the legs feel loose, pull the unit away from the wall, tilt it back onto a support, and tighten each foot with a wrench.
This single fix resolves more squeaky dryer complaints than most people expect, so it’s worth ruling out before you touch anything else.
Step 2: Inspect the Drum Support Rollers
Drum support rollers are small wheels — usually two to four of them — that carry the weight of the drum as it spins. Over years of use, they develop flat spots, or the small bearing inside each roller dries out. That’s when you start hearing a rhythmic squeak that speeds up and slows down in step with the drum.
To check them
- Unplug the dryer, then remove the top and front panels (your owner’s manual will show the exact screw locations for your specific model).
- Spin each roller by hand. A good roller turns smoothly with no grinding, wobble, or resistance.
- Replace any roller that feels stiff, noisy, or shows visible wear such as flat spots or cracking.
It’s usually worth replacing all the rollers as a set, even if only one looks bad, since the rest tend to be close behind in wear. The parts themselves are inexpensive, and doing them together means you won’t be back inside the cabinet again in a few months chasing the same squeaking dryer noise.
Step 3: Check the Idler Pulley
The idler pulley keeps steady tension on the drive belt so the drum spins without slipping. Because it spins constantly whenever the dryer runs, the small bearing inside it tends to dry out and squeal — often right at startup. If your squeaking dryer is loudest in the first few minutes of a cycle and eases up as things warm up (or the reverse happens), the idler pulley is a strong suspect.
With the belt released, spin the pulley by hand. It should rotate freely and quietly. If it feels gritty, sticks, or wobbles on its mount, replace the whole pulley assembly rather than trying to lubricate it. Most idler pulleys are sealed units meant to be swapped out, not oiled, so lubricant only masks the noise temporarily.
Step 4: Look at the Drive Belt
A worn drive belt can cause a chirping, slipping, or squealing sound that changes character as the dryer heats up. Inspect the belt closely for cracks, fraying, or a shiny “glazed” section, which is a sign it’s been slipping against the motor pulley instead of gripping it properly.
If the belt shows any of these signs, replace it with the exact part number listed for your model — belt width and length both affect proper tension, so a generic substitute can create new noise problems. Resist the urge to spray any kind of lubricant directly on the belt. It won’t quiet a squeaking dryer for long, and it can actually make the belt slip even more.
Step 5: Examine the Rear Drum Bearing and Glides
If the squeaking dryer noise seems to come from the very back center of the unit, the rear bearing that supports the drum may be worn or dry. This repair tends to be more involved than the others, since it often requires partially disassembling the drum, so many homeowners choose to have a technician handle this particular step.
On the front side, some dryer models use felt seals or plastic glides instead of a rear bearing to help the drum move smoothly. When these wear thin, the drum ends up rubbing bare metal against metal, which usually produces more of a scraping or screeching sound than a light squeak. Replacing worn glides is generally a straightforward job once the front panel is off, and it’s a common fix for a squeaking dryer that’s a few years old.
Step 6: Rule Out Lint, Loose Parts, and the Blower Wheel

Sometimes the fix is less exciting than a full parts swap. A buildup of lint around the motor or blower housing can create rubbing noises on its own, and small stray items — coins, buttons, bra wires — occasionally get trapped near the drum and produce a squeak or scrape with every rotation.
While the panels are open, it’s also worth checking that no screws, brackets, or panels have loosened from years of vibration. A loose panel can produce a noise that sounds far more serious than it actually is, and tightening a few screws is sometimes all it takes to quiet a squeaking dryer for good.
Can You Just Lubricate a Squeaking Dryer?
Sometimes, but you have to be careful about what you use. Never reach for WD-40 or standard household oil inside a dryer — these products aren’t rated for the high internal temperatures a dryer reaches and can create a fire risk over time.
If a part is actually meant to be lubricated, such as certain roller shafts, use a high-temperature, non-combustible lubricant made specifically for appliances. Sealed bearings, on the other hand, aren’t designed for lubrication at all. If one of those is squeaking, replacement will get you a much longer-lasting result than trying to oil your way around the problem
Common Mistakes to Avoid When Fixing a Squeaking Dryer
If one drum support roller is heavily worn, the remaining rollers may have similar wear. Replacing a matching set can provide smoother drum movement and reduce the chance of another squeaking problem soon after the repair.
Lubricant may temporarily reduce noise, but it will not repair a worn sealed bearing. If the bearing is damaged, replacement is usually the more reliable solution.
Dryer belts are designed for specific drum sizes and tension systems. Always use the correct replacement part for your dryer model.
A dryer squeaking sound can eventually develop into grinding or scraping when wear becomes severe. Stop and inspect the appliance rather than continuing to run it.
Before reinstalling the panels, make sure the belt is correctly positioned around the drum, idler pulley, and motor pulley. Incorrect routing can cause new noise or prevent the drum from turning properly.
When to Call a Professional
Most squeaking dryer repairs — leveling the feet, replacing rollers, swapping the idler pulley, or installing a new belt — are manageable weekend projects with basic hand tools. That said, it’s worth calling a professional if:
- You can’t pinpoint where the noise is coming from after checking the usual parts
- The sound is a grinding or metal-on-metal noise rather than a true squeak
- You notice a burning smell or the drum feels loose when you push on it
- The repair involves the rear drum bearing assembly or the motor itself
- You have a gas dryer and aren’t comfortable working near the gas line
A squeaking dryer usually isn’t dangerous on its own in the short term, but letting it go too long can wear down surrounding parts and turn a simple fix into a much bigger repair bill.
Keeping Your Dryer Quiet Going Forward
A few habits go a long way toward keeping a squeaking dryer from becoming a repeat problem:
- Clean the lint filter before every load
- Avoid consistently overloading the dryer, which puts extra strain on the rollers and bearings
- Vacuum lint out from around the blower and motor area once or twice a year
- Keep the dryer properly leveled, especially after moving it or reinstalling it after a repair
You May Also Like
If your dryer is making unusual noises, stopping unexpectedly, or having other operating problems, these related repair guides may help you troubleshoot the problem faster:
More Dryer Repair Guides
Dealing with another dryer problem? These additional guides cover common starting, heating, airflow, and control issues:
Final Thoughts
A squeaking dryer is annoying, but it’s rarely a sign that you need a whole new machine. In the large majority of cases, the fix comes down to one of a few well-known parts — the rollers, the idler pulley, the belt, or the leveling feet — and none of them require advanced skills to diagnose. Work through the checks in order, starting with the simplest ones, and you’ll usually land on the answer before you’ve opened more than one or two panels. Once the worn part is replaced, most dryers run quietly again for years, so it’s worth taking the time to fix it properly rather than living with the noise.


Comments