Dryer Won’t Stay Running
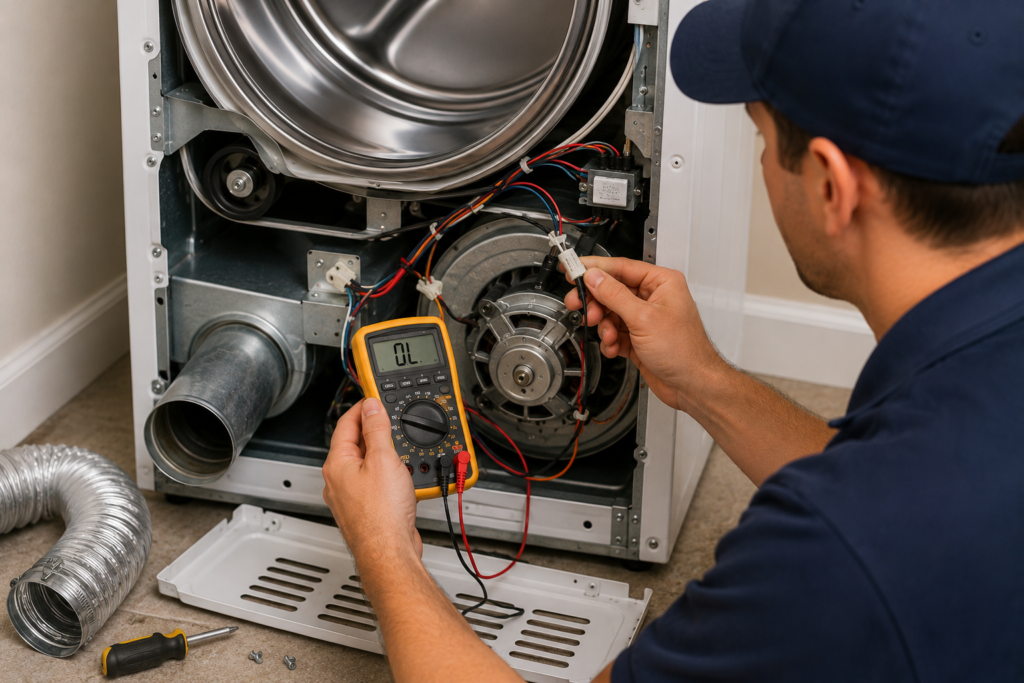
You load up the dryer, hit Start, and walk away. only to come back and find your clothes still damp. The machine ran for a minute or two, then stopped on its own. You press Start again. Same thing. Runs briefly, then quits.
If your dryer won’t stay running, you’re not dealing with a random malfunction. Something inside that machine is triggering a shutoff. either as a safety response to a real problem, or because a component is failing under load. The good news? This problem almost always has a clear, fixable cause. Once you know what to look for, you can track it down yourself without calling a technician right away.
This guide walks you through every likely cause, from the simplest fixes to the more involved repairs, so you can stop guessing and start diagnosing
Quick Troubleshooting Guide
| Symptom | Most Likely Cause |
|---|---|
| Stops after 2–3 minutes | Blocked vent or overheating |
| Runs again after cooling down | Overheating drive motor |
| Stops during Auto Dry only | Dirty moisture sensor |
| Starts then immediately quits | Door switch or broken drive belt |
Table of Contents
Pay Attention to the Pattern Before Your Dryer Won’t Stay Running Gets Worse
Before opening panels or testing parts, spend a minute observing exactly what’s happening. The timing and behavior of the shutoff gives you real diagnostic clues.
- Does the dryer shut off after exactly 2–3 minutes every single time?
- Does it run longer on a cold start but quit faster once the machine is already warm?
- Does heat seem low or absent right before it stops?
- Does it shut off the moment you open the door?
Every one of these patterns points toward a specific component. Don’t skip this step. it can save you a lot of unnecessary disassembly
Clogged Lint Trap or Blocked Exhaust Ventm. Start Here Every Time
When a dryer won’t stay running, this is the most common cause by a significant margin. Before you test any parts, check your airflow first.
Here’s why it matters: dryers generate a large amount of heat during operation, and that heat needs a clear exit path .through the lint filter, through the exhaust duct, and out the exterior vent flap. When any part of that path is blocked or restricted, internal temperatures spike quickly. The dryer’s built-in thermostats detect this and automatically cut power before any fire risk develops. So what looks like a mysterious mid-cycle shutoff is actually the machine doing exactly what it was designed to do.
How to check the lint trap:
Pull out the lint filter and clean it properly .not just a quick swipe. If you regularly use dryer sheets, an invisible residue layer can coat the mesh and block airflow even when the filter looks clean. Run it under warm water, scrub lightly, and let it dry completely before putting it back.
How to check the exhaust duct:
Pull the dryer away from the wall and disconnect the exhaust duct from the back. Look inside for lint buildup, kinks, sharp bends, or crushed sections. A kinked duct is one of the most overlooked causes of a dryer that won’t stay running. it’s easy to miss because everything looks fine from the outside.
How to check the exterior vent:
Go outside and locate where the vent exits your home. The flap should open freely when the dryer is running. If it’s stuck shut, clogged with debris, or blocked by bird nesting material, that single restriction can cause repeated overheat shutoffs even if everything else inside the machine is working perfectly
Blown Thermal Fuse

The thermal fuse is a one-time safety device. When the dryer overheats beyond a set temperature threshold, this fuse permanently blows to cut off power and prevent damage or fire. Once blown, it cannot reset. it must be physically replaced.
On many dryer models, a blown thermal fuse means the machine won’t start at all. But depending on where the fuse sits in the circuit, some models will allow the dryer to run briefly before the failed fuse cuts out. which is exactly why a blown thermal fuse is a frequent cause when a dryer won’t stay running.
You’ll typically find it on the exhaust duct inside the back panel. Testing is straightforward: unplug the dryer, disconnect the wires from the fuse, and test with a multimeter set to continuity. No continuity means it’s blown. The part itself usually costs under $15.
Important: replacing the thermal fuse without fixing the underlying airflow problem will just blow the new fuse again. Always address the root cause first
Failing Cycling Thermostat
The cycling thermostat regulates operating temperature throughout the drying cycle, signaling the heating element to turn on and off to maintain the right heat level. When it starts to fail, it can produce inaccurate temperature readings. causing the dryer to interpret normal heat as dangerously high and trigger an early shutoff.
A tell-tale sign: the problem gets worse the longer the machine has been running. As internal temps naturally rise over time, a faulty cycling thermostat becomes more likely to misread the situation and cut the cycle short.
Test it with a multimeter continuity check at room temperature. A functioning thermostat should show continuity. If it doesn’t, replace it
You May Also Like
If your dryer won’t stay running, these related troubleshooting guides can help you diagnose other common dryer problems faster:
Broken or Worn Drive Belt
The drive belt wraps around the drum, the motor pulley, and the idler pulley to keep the drum spinning continuously. If this belt snaps or slips off, the drum stops. and on many dryer models, a belt switch immediately cuts power to the entire machine. This prevents clothes from sitting against a stationary heating element, which would be a fire risk. The result is a dryer that fires up, starts a cycle, then shuts off within seconds
Quick check: Open the dryer door and try turning the drum by hand. If it spins very easily with almost no resistance, the belt is most likely broken or has slipped off the pulley. Replacing the belt requires removing a panel, but it’s a manageable DIY repair on most standard dryer models and the parts are widely available
Faulty Door Switch
The door switch tells the dryer’s control system that the door is properly closed and safe to run. A worn or intermittently failing door switch may make good contact when you first press the door shut. enough to start the cycle. but lose that contact once the machine begins vibrating. The result is a mid-cycle shutoff that’s hard to predict.
Quick test: Hold the door firmly shut with your hand while the dryer is running. If it runs more consistently with the door held in place, the door switch or latch is your problem.
You can confirm a failed door switch with a multimeter. it should show continuity only when fully depressed. Inconsistent readings mean it needs to be replaced. It’s one of the cheaper components on any dryer
Motor Overheating

The drive motor runs continuously for the entire drying cycle. Over years of use, internal bearings wear down and the motor has to work harder than it was designed to. A struggling motor generates excess heat, and most motors include a built-in thermal overload protector that cuts power before damage occurs.
When the motor is the issue, you’ll notice a very specific pattern: the dryer runs for a while, shuts off, then works again after sitting for 15–20 minutes. only to shut off again after another short run once the motor heats back up.
Before replacing the motor, check the blower wheel first. Lint and debris can pack tightly into the blower wheel, forcing the motor to strain against the added resistance and overheat even if the motor itself still has life left in it. Clearing the blower wheel sometimes resolves the issue entirely
Coated Moisture Sensor Strips

Most modern dryers include a moisture sensor. two small metal strips inside the drum, usually located near the lint filter opening. As clothes tumble past them, the strips detect electrical conductivity: wet clothes conduct electricity between the strips, dry clothes don’t. When conductivity drops, the sensor signals the cycle to end.
If these strips get coated in residue from dryer sheets or fabric softener, they can give false “dry” readings and shut the cycle off prematurely .even when your clothes are still damp. This specific problem typically presents as the dryer stopping after just a few minutes on an auto-dry cycle.
The fix is easy: wipe the metal strips down with a cloth lightly dampened with rubbing alcohol, let them dry fully, then run a test cycle
Timer or Control Board Faults
On older dryers with mechanical timers, the internal contacts wear out over time and the timer may fail to advance properly through the cycle. causing the dryer to stop before the load is dry.
On newer electronic models, a faulty main control board can send incorrect signals that interrupt the cycle unpredictably. This is less common than the mechanical causes above, but it becomes more relevant once everything else has been ruled out. If your dryer displays error codes, check your owner’s manual. those codes often point directly to the failing component and can save you a lot of diagnostic time
Safety Note
Always unplug the dryer before removing any panels or testing electrical components. Allow the appliance to cool completely if it has recently stopped due to overheating. Never bypass a thermal fuse or safety switch, as these components are designed to prevent overheating and reduce the risk of fire.
How to Diagnose a Dryer That Won’t Stay Running. In the Right Order
When your dryer won’t stay running, the order you check things matters. Don’t jump to expensive parts first. Work through this sequence:
- Airflow first. Clean the lint trap, inspect and clear the exhaust duct, confirm the exterior vent flap opens freely. This single step resolves the majority of cases.
- Thermal fuse. Inexpensive, easy to access, and often the direct cause after an overheating event. Test with a multimeter.
- Door switch and drive belt. Both are affordable parts and straightforward to test without major disassembly.
- Cycling thermostat and moisture sensor strips. Require a bit more investigation but are still DIY-friendly on most models.
- Motor and blower wheel. Check the blower wheel for debris before considering a motor replacement.
- Timer or control board. Last resort. only investigate these after all the above have been ruled out.
When to Call a Technician
Most of the causes above are genuinely DIY-friendly. But there are situations where calling a professional makes more sense:
- The motor needs replacement (involves removing the drum and wiring)
- The main control board is suspected and you’re not comfortable with electrical diagnosis
- The dryer repeatedly blows thermal fuses despite clearing the vent path
- You’re seeing error codes that point to internal electrical faults
A qualified appliance technician can confirm the diagnosis quickly and source the right parts. and for motor or control board work specifically, the repair is safer and more reliable in professional hands. If your dryer won’t stay running even after checking airflow, the thermal fuse, door switch, and motor, a professional diagnosis can help identify less common electrical faults.
Prevention Tips
- Clean the lint filter after every drying cycle.
- Inspect and clean the exhaust vent every 6–12 months.
- Avoid crushing or sharply bending the vent hose behind the dryer.
- Do not overload the drum, as extra weight increases motor strain.
- Wipe the moisture sensor strips occasionally with rubbing alcohol.
- Listen for unusual noises and address small problems before they become major repairs.
One Final Thing to Know If Your Dryer Won’t Stay Running
A dryer that won’t stay running is almost never a reason to replace the whole machine. The components that cause this problem. thermal fuses, door switches, belts, thermostats .are inexpensive and widely available for most dryer brands. The repairs are manageable for anyone comfortable with basic tools.
The key is working through the causes in the right order, confirming before you move on, and not skipping the simple airflow check that solves the problem more often than anything else. Start there, and you’ll have a working dryer again faster than you think
About the Author
Muhammad Khalid
Muhammad Khalid is the founder of FixAppLab, where he publishes practical appliance troubleshooting guides designed to help homeowners diagnose and solve common problems with washing machines, dryers, and refrigerators. Every guide focuses on clear, step-by-step instructions, safety, and reliable maintenance advice to help readers make informed repair decisions.
Connect with FixAppLab for more appliance repair tips and troubleshooting updates:


Comments