Refrigerator Water Dispenser Not Working
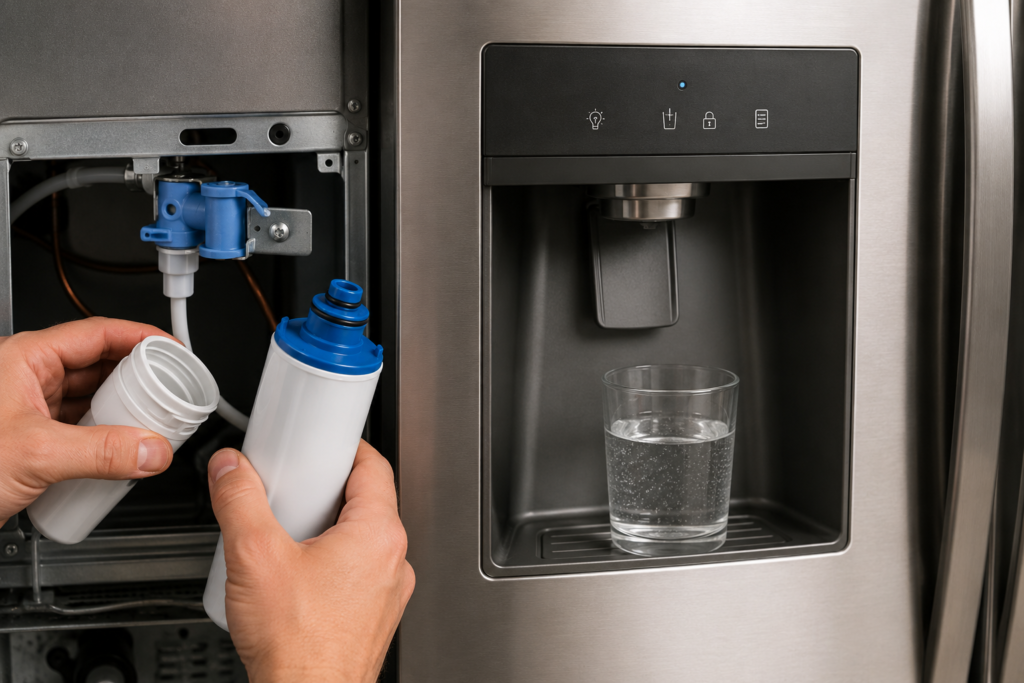
Is your refrigerator water dispenser not working? You press the lever, hold your glass steady, and nothing happens .no water, no trickle, not even a sound. It’s one of those frustrating problems that seems simple on the surface but can have several different causes hiding underneath.
The good news is that most of the time, this is a problem you can diagnose and fix yourself. No service call required. In this guide, we’ll walk through every common reason a refrigerator water dispenser stops working. and exactly what to check, test, and replace to get it flowing again
Table of Contents
Start Here If Your Refrigerator Water Dispenser Not Working
Before pulling the refrigerator away from the wall or ordering any parts, check two things first.
Check the control lock. Most modern refrigerators. Samsung, LG, Whirlpool, GE. have a dispenser lock or control lock feature that completely disables the water and ice dispenser. It’s designed to prevent accidental use, but it gets activated accidentally more often than you’d think. Look for a lock icon on the control panel. If it’s lit up, press and hold the lock button for 3 seconds to turn it off. This alone fixes the problem for a surprising number of people.
Check the water supply valve. Make sure the shutoff valve behind or beneath the fridge is fully open. A valve that’s even partially closed can reduce water pressure enough to stop the dispenser entirely. If both of those check out fine, move on to the causes below
Quick Troubleshooting Guide
If your refrigerator water dispenser suddenly stops working, start with these quick checks before replacing any parts. Most dispenser problems are caused by simple issues that can be resolved within a few minutes.
| Check | Recommended Action |
|---|---|
| Control Lock | Disable the dispenser lock from the control panel. |
| Water Supply | Make sure the shutoff valve is fully open and the supply line isn’t kinked. |
| Water Filter | Replace an old filter or test the dispenser using the bypass plug. |
| Frozen Water Line | If you hear a click but no water flows, inspect the dispenser line for freezing. |
| Inlet Valve | Inspect the valve screen for sediment and test the solenoid with a multimeter. |
| Dispenser Switch | Check the micro switch for continuity if the lever feels normal but nothing happens. |
| Door Switch | Verify the refrigerator recognizes that the door is fully closed. |
| Control Board | Perform a power reset. If the problem returns, the board may require replacement. |
Time-Saving Tip: Start with the control lock, water supply, and water filter before testing electrical components. These simple checks solve the majority of refrigerator water dispenser issues.
Frozen Water Line
A frozen water tube is one of the most common reasons a refrigerator water dispenser stops working. and it’s easy to miss because everything else about the fridge seems to be working normally.
The water supply tube runs through the freezer compartment or door to reach the dispenser. If your freezer is set too cold (below 0°F / -18°C), that tube can freeze solid, completely blocking water flow even though the dispenser motor is still activating.
How to tell if the line is frozen: You’ll usually hear the dispenser hum or click when you press the lever, but no water comes out. That clicking sound means the motor is trying. the blockage is physical, not electrical.
How to fix it: Unplug the refrigerator and leave the freezer door open for 1–2 hours to let the line thaw naturally. You can speed things up by using a hairdryer on the lowest heat setting directed at the door liner where the water line runs. Once it’s thawed, set your freezer temperature to 0–5°F to prevent it from happening again
Clogged or Expired Water Filter

A clogged water filter is the single most common cause of a refrigerator water dispenser not working or producing only a weak trickle. Most manufacturers recommend replacing the filter every 6 months, but if you have hard water or high sediment in your area, it can clog out much sooner.
Signs the filter is the problem:
- Water flow is noticeably slower than it used to be
- The filter indicator light on the display is red or blinking
- You can’t remember the last time the filter was changed
How to confirm it: Remove the filter and insert the bypass plug that came with your refrigerator. Try the dispenser. If water flows normally with the bypass in place, the filter is definitely clogged and needs to be replaced.
After installing a new filter: Hold the dispenser lever down continuously for 30–60 seconds to purge air from the line. Discard the first 2–3 glasses of water to flush any carbon particles from the new filter. Skipping this step can leave you with sputtering, air-filled flow for hours
Safety Note
Before inspecting internal refrigerator components, always disconnect the power cord from the electrical outlet and shut off the household water supply. This helps prevent electrical shock, accidental water leaks, and damage to appliance components while troubleshooting.
Follow These Basic Safety Steps
- Unplug the refrigerator before removing access panels or testing electrical parts.
- Turn off the water supply valve before disconnecting any water lines.
- Keep electrical connectors and wiring dry during inspection.
- Use only insulated tools when testing switches or inlet valves with a multimeter.
- Avoid using excessive heat to thaw a frozen water line, as it may damage plastic tubing or door insulation.
- Reconnect all water lines securely before restoring power.
Important: If you notice burnt wiring, melted connectors, or signs of water leaking onto electrical components, stop troubleshooting and have the refrigerator inspected by a qualified appliance technician.
Faulty Water Inlet Valve

The water inlet valve is an electrically controlled solenoid that opens to let water from your home’s supply line into the refrigerator. When it fails, water simply can’t get in. and the dispenser produces nothing regardless of what else you try.
This is one of the more common causes of a refrigerator water dispenser not working in older units. The valve can fail in two ways: the internal screen gets clogged with mineral deposits and sediment, or the solenoid itself burns out electrically and stops opening.
How to check it: The inlet valve is typically located at the back of the refrigerator near the bottom. Unplug the fridge and disconnect the water supply line. Inspect the small screen inside the valve inlet .if it’s visibly caked with sediment, that’s your problem. To test the solenoid electrically, use a multimeter set to continuity. No continuity means the solenoid has failed and the valve needs to be replaced.
How to fix it: A clogged screen can sometimes be cleaned to restore flow. A failed solenoid means the entire valve assembly needs replacing. This is an affordable part and a repair most homeowners can do themselves .just confirm the part number matches your refrigerator model before ordering
Broken Dispenser Switch

Every time you press the water lever, you’re triggering a small micro switch that sends a signal to the inlet valve to open. If that switch wears out or breaks, the signal never gets sent. and no water flows, even if every other component is in perfect working order.
This is more common in refrigerators with heavy daily use, where the lever gets pressed dozens of times a day over several years.
How to check it: Remove the dispenser panel from the front of the fridge. it’s usually held by a few screws or plastic clips. Locate the switch behind the lever assembly. Set a multimeter to continuity mode, press the lever manually, and test the switch terminals. A good switch shows continuity when pressed and none when released. If it shows no continuity at all, even when pressed, the switch has failed.
Dispenser switches are inexpensive and straightforward to replace once you have the panel off
You May Also Like
If your refrigerator water dispenser is not working, these related troubleshooting guides can help you diagnose and fix the problem more quickly:
Low Water Pressure
Your refrigerator’s water system needs adequate pressure to function. typically between 20 and 120 PSI, with 40–60 PSI being the sweet spot. When household water pressure drops too low, the inlet valve won’t open properly, and the refrigerator water dispenser either produces nothing or delivers a painfully slow trickle.
The most common culprits are a partially closed shutoff valve, a kinked supply line behind the refrigerator, or homes that are connected to a reverse osmosis filtration system (which naturally reduces water pressure as a side effect).
How to check: Pull the refrigerator away from the wall and inspect the water supply line for any kinks or pinches. Make sure the shutoff valve is turned all the way open. If you want to confirm pressure isn’t the issue, disconnect the supply line from the back of the fridge and briefly run water into a bucket. if the flow is strong and steady, pressure is fine
Door Switch Malfunction
Most refrigerators include a door switch that disables the dispenser when the refrigerator door is open, preventing accidental dispensing. If this switch gets stuck or fails in the “open” position, the refrigerator permanently thinks the door is open. and keeps the dispenser disabled even when the door is fully closed.
How to test it: Find the door switch. it’s a small button on the door frame. Open the door and press it manually while someone activates the dispenser. If water flows when you manually depress the switch but not under normal use, the switch is faulty. It’s one of the cheapest and quickest repairs on the list
Control Board Failure
The electronic control board manages the signals that coordinate dispenser functions. When it fails, the dispenser can stop working entirely even though the inlet valve, switch, filter, and water supply are all perfectly fine.
Control board failure is less common than the other issues on this list, but it does happen .particularly after power surges or in units that are 7–10 years old. A quick test: unplug the refrigerator for 5 minutes and plug it back in. This resets the board and can clear temporary software faults. If the dispenser works after the reset, you may just need to keep an eye on it. If the board has fully failed, replacement is the only fix .and this is one repair where calling a professional is often worth the cost, since control boards are model-specific and can be expensive to get wrong.
Brand-Specific Notes
A few things worth knowing depending on what brand of refrigerator you have:
Samsung french-door and side-by-side models are especially prone to frozen water lines in the freezer door. Also confirm the dispenser is set to “Water” mode on the display panel, and check for the Control Lock icon. it activates easily on Samsung panels.
LG routes the water line through the left door hinge, and years of repeated door opening can cause micro-cracks in the tubing right at the fold point. If you see water dripping from the bottom-left of the fridge, that’s likely the source. The Dispenser Lock mode can also be toggled by pressing and holding the Dispenser Lock button for 3 seconds.
Whirlpool and Maytag commonly develop inlet valve screen clogs from sediment. Also note that newer Whirlpool models require you to press and hold the filter reset button for 3 seconds after a filter change to restore normal dispenser operation .skipping this step leaves the dispenser restricted.
GE refrigerators will not dispense water at all if the filter housing is empty with no filter or bypass plug installed. If someone removed the old filter without putting in a replacement or bypass plug, that’s your answer. GE inlet valve solenoids also tend to fail between 5–7 years, particularly in areas with hard water
Prevention Tips
A little routine maintenance can prevent many refrigerator water dispenser problems before they start. Following these simple habits helps maintain steady water flow, improves water quality, and may extend the life of your refrigerator’s water system.
- Replace the water filter every 6 months, or sooner if you notice reduced water flow or poor water taste.
- Keep the freezer temperature between 0°F and 5°F (-18°C to -15°C) to reduce the risk of a frozen dispenser water line.
- Inspect the water supply line regularly for kinks, cracks, or leaks behind the refrigerator.
- Flush a new water filter by dispensing water for 30–60 seconds after installation to remove trapped air and loose carbon particles.
- Clean around the dispenser area to prevent dirt and moisture from affecting the dispenser lever or switch.
- Check for sediment buildup if your home has hard water, as mineral deposits can restrict the inlet valve over time.
- Avoid repeatedly slamming the refrigerator door, which can place unnecessary stress on the dispenser tubing and door wiring.
Maintenance Tip: Spending just a few minutes inspecting your refrigerator every few months can help prevent unexpected dispenser failures and reduce the likelihood of expensive repairs later.
When to Call a Professional for a Refrigerator Water Dispenser Not Working
The majority of refrigerator water dispenser not working problems are genuinely DIY-friendly. Frozen lines, filter replacements, inlet valves, door switches, and dispenser switches are all repairs a handy homeowner can handle with basic tools and a multimeter.
That said, if you’ve worked through everything on this list and the dispenser still isn’t working, or if the issue turns out to be the control board, it’s worth bringing in a certified appliance technician. At that point, the cost of continued trial-and-error. wrong parts, more hours spent .can easily exceed what a professional diagnosis costs
Quick Refrigerator Water Dispenser Not Working Troubleshooting Guide
If you want to work through this efficiently, here’s the order that makes the most sense:
- Check and disable the control lock on the panel
- Inspect the water supply valve and supply line for kinks
- Replace the water filter (or test with the bypass plug)
- Check if the water line in the freezer is frozen
- Test the water inlet valve screen and solenoid
- Test the dispenser micro switch for continuity
- Check the door switch
- Try a power reset for the control board
Start simple. Most refrigerator water dispenser problems are solved somewhere in steps 1 through 4
Final Thoughts
A refrigerator water dispenser not working is rarely as complicated as it first seems. The overwhelming majority of cases come down to a frozen line, a clogged filter, a failed inlet valve, or a worn dispenser switch. all of which are fixable without professional help.
Work through the list systematically, start with the easiest checks, and you’ll most likely have cold water flowing again well before you ever need to pick up the phone
Refrigerator Water Dispenser Not Working FAQs
Why is my refrigerator water dispenser not working after a filter change?
Air gets trapped in the water line during a filter swap. Press and hold the dispenser lever continuously for 30–60 seconds to purge the air. Throw away the first few glasses of water to clear any carbon particles from the new filter.
How do I know if my refrigerator water line is frozen?
The clearest sign is hearing the dispenser motor hum or click when you press the lever, but getting no water. The motor is activating. something physical is blocking the flow. A frozen line is the most likely cause, especially if the freezer is running below 0°F.
Can low water pressure stop my refrigerator dispenser from working?
Yes. Most refrigerators need a minimum of 20 PSI to open the inlet valve properly. Below that threshold, the dispenser either won’t work at all or will produce a very weak flow. Check for kinks in the supply line and confirm the shutoff valve is fully open.
How often should the water filter be replaced?
Every 6 months under normal use. In areas with hard water or high sediment, every 4 months is a better target to maintain good flow rate and water quality.
Is replacing a water inlet valve a difficult repair?
Not particularly. The part typically costs $35–$80 depending on your refrigerator model. With the fridge unplugged and the water supply disconnected, most homeowners can swap it out in 30–45 minutes. If you’re not comfortable working around electrical components, a technician can handle it for $115–$195 including labor.
About the Author
Muhammad Khalid is the founder of FixAppLab, where he publishes practical appliance troubleshooting guides designed for homeowners and DIY repair enthusiasts. His articles focus on explaining common refrigerator, washing machine, and dryer problems using clear step-by-step instructions that are easy to understand and follow.
Every guide is carefully researched, regularly updated, and written to help readers identify appliance faults safely before replacing expensive parts or scheduling a service visit. The goal of FixAppLab is to make appliance repair information accurate, practical, and accessible for everyone.


Comments