Dryer Timer Not Advancing: 7 Causes, Easy Fixes & Step-by-Step Diagnosis
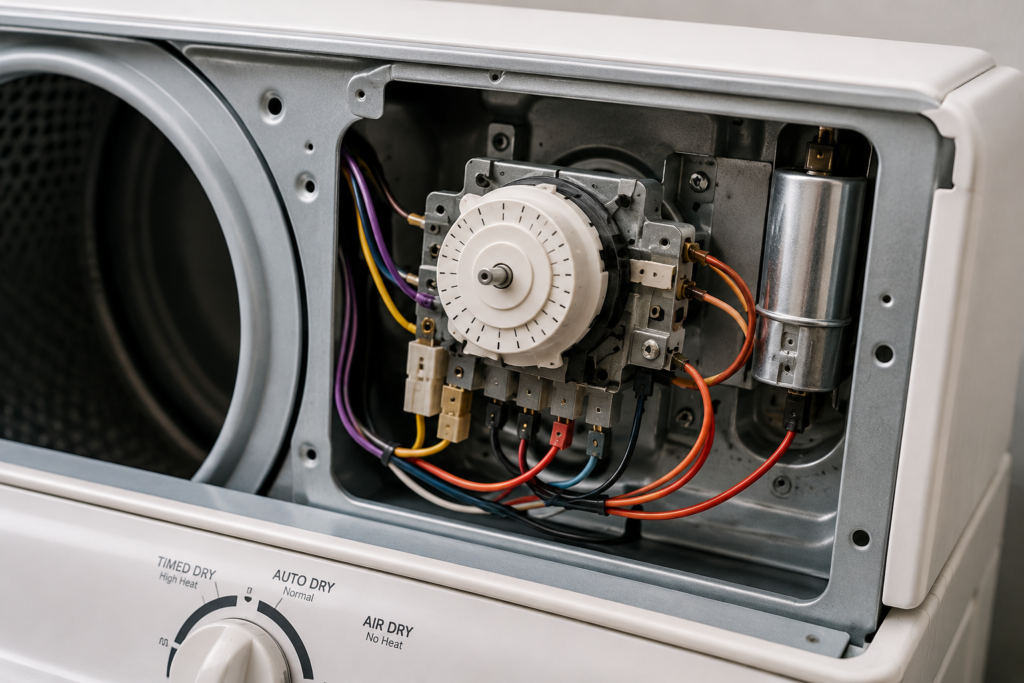
If your dryer has been running for 40 minutes and the timer hasn’t moved a single notch, you already know how frustrating this feels. The drum is spinning, maybe even producing heat, but the cycle sits frozen in one position. A dryer timer not advancing is one of those problems that seems confusing at first because the machine appears to be working. yet your clothes stay damp and the dial never moves.
The good news is that this is almost always fixable. In most cases, it comes down to one failed component, and many of these repairs are well within DIY range. This guide covers every major cause of a dryer timer not advancing, how to test each part correctly, and the right order to check things. so you don’t waste money replacing parts that don’t need replacing
Quick Key Takeaways
If your dryer timer is not advancing, the problem is often caused by a failed timer motor, faulty cycling thermostat, dirty moisture sensors, restricted airflow, or a heating system fault. Before replacing the timer, work through a systematic diagnosis to identify the actual cause and avoid unnecessary repair costs.
- Test the dryer on Timed Dry and Auto Dry to narrow down the cause.
- Clean the moisture sensor bars before replacing any parts.
- Inspect and clean the entire exhaust vent to restore proper airflow.
- Use a multimeter to check the timer motor, cycling thermostat, thermal fuse, and heating element.
- Replace components only after confirming they have failed through proper testing.
Table of Contents
First: Understand How Your Dryer Timer Actually Works
In most traditional dryers, the timer is an electromechanical device .a small motor connected to plastic gears that rotate a series of cams. Those cams open and close electrical contacts as the cycle moves forward, controlling the heating element, the drum motor, and the timer motor itself.
The key thing to understand is this: the timer doesn’t operate on its own. It depends on other components. especially the cycling thermostat and the heating circuit .to receive the signal it needs to advance. So when your dryer timer is not advancing, the timer itself may be perfectly fine. Something else in the circuit could be blocking it.
This is exactly why a systematic diagnosis matters. Replacing the timer first, without testing anything, is one of the most common and expensive mistakes homeowners make
Timed Dry vs. Auto-Dry: Check This First
Before touching anything inside the dryer, pay attention to which cycle the timer is getting stuck on. This one detail can point you toward the cause immediately.
- Timed Dry cycles rely directly on the timer motor to count down. If the timer doesn’t advance on timed dry. even with an empty drum. the timer motor or its power circuit has likely failed.
- Auto-Dry or sensor cycles work differently. The moisture sensor or cycling thermostat controls when the timer advances. On these cycles, the timer may move sporadically or in small jumps. that’s actually normal. But if the knob hasn’t moved at all after an hour or more, something has gone wrong.
Quick test: Switch your dryer to timed dry and run a short cycle. If the timer advances normally on timed dry but stays stuck on auto-dry, your moisture sensors are the place to start
Why Your Dryer Timer Is Not Advancing: 7 Causes Explained

1. Failed Timer Motor
This is the most direct cause. The timer motor sits on the back of the timer assembly and physically rotates the dial forward. If the motor burns out or the internal plastic gears strip, the timer stops moving entirely.
Gear failure is actually very common. The plastic components inside the timer wear down over years of use, and once a section of the gear train fails, the timer stalls at that same point every cycle.
How to test it:
- Disconnect the dryer from power and remove the control console.
- Locate the timer assembly and set your multimeter to Rx1 (ohms).
- Place the probes on the two terminals that power the timer motor.
- A healthy timer motor reads between 2,000 and 3,000 ohms. Anything outside that range. or an open reading .means the motor has failed.
One important note: the internal parts of a timer assembly, including the motor and gears, are not sold separately. If the timer motor has failed, you’ll need to replace the entire timer unit. Model-specific replacements typically cost between $20 and $80
2. Faulty Cycling Thermostat
A failed cycling thermostat is one of the most common real-world fixes for a dryer timer not advancing. and it’s frequently overlooked because the dryer may still appear to run normally.
Here’s why it causes this problem: on many dryer models, the cycling thermostat and the timer motor are wired in series. The thermostat opens and closes as drum temperature rises and falls, and this switching action is what allows the timer to advance in small increments. When the thermostat fails in the open position, it breaks the circuit to the timer motor. The drum may still spin and some heat may still be present. but the timer never gets the signal to move.
How to test it:
- Unplug the dryer and let it cool fully to room temperature. this matters for an accurate reading.
- Open the dryer cabinet and locate the cycling thermostat, usually mounted on the blower housing or along the exhaust airflow path.
- Test for continuity with a multimeter. At room temperature, a good thermostat shows continuity.
- An open reading confirms the thermostat has failed.
Cycling thermostats are inexpensive .often under $15. making this one of the most cost-effective solutions when your dryer timer is not advancing
3. Clogged Exhaust Vent
A blocked exhaust vent is easy to overlook, but it directly causes a dryer timer not advancing in many cases. and it’s also a genuine fire hazard that needs to be addressed regardless.
When lint builds up inside the duct or the exterior vent hood becomes blocked, the dryer can’t expel moist hot air efficiently. Internal temperatures spike. Thermal safety devices kick in and interrupt the heating circuit. Since the timer’s advancement is tied to normal heat cycling, a severe blockage can stall the timer completely.
Check the flexible duct at the back of the dryer for kinks, crushing, or visible blockages. Then go outside and inspect the exterior vent hood .birds nest inside these during warmer months, and lint accumulation can seal the opening entirely. A full duct cleaning with a brush kit often resolves heat-related timer problems without replacing any parts at all
4. Dirty or Faulty Moisture Sensors
If your dryer timer not advancing problem only happens on auto-dry or sensor cycles, check the moisture sensors before opening the machine.
These are typically two metal bars inside the drum, positioned just below the door opening. Dryer sheet softener residue builds up on these bars over time, coating them with an insulating film. When that happens, the sensor reads the clothes as permanently wet. and holds the cycle in place indefinitely.
The fix is simple: Dampen a cloth with rubbing alcohol and wipe both sensor bars thoroughly. Run a test cycle afterward. This single step resolves the problem more often than you’d expect.
If cleaning doesn’t help, inspect the wiring harness connected to the sensors. A broken or corroded wire produces the exact same stuck-cycle symptom
5. Blown Thermal Fuse
The thermal fuse is a one-time safety device that permanently opens when the dryer overheats. Once blown, it cannot reset. it must be replaced. Depending on where it sits in the wiring layout, a blown thermal fuse can cut power to the timer motor circuit, cut off the heating element, or in some cases prevent the dryer from starting altogether.
A blown thermal fuse is almost always caused by a clogged exhaust vent or a failed cycling thermostat. Replacing the fuse without fixing the underlying cause means the new fuse will fail again quickly.
Test it with a multimeter. no continuity confirms it’s blown. Thermal fuses are inexpensive and available by model number from any appliance parts supplier
6. Defective Heating Element
If the heating element fails completely, some dryers experience a dryer timer not advancing as a secondary effect. With no heat, the cycling thermostat never reaches its switching temperature. it stays open and never sends the advance signal to the timer motor.
The sign to watch for here: clothes coming out completely cool and still damp after an unusually long run, with the drum spinning but no warmth inside. Test the heating element for continuity. No reading means it needs to be replaced
7. Control Board Failure (Electronic Models)
On newer dryers with digital control panels, the control board manages all cycle advancement through software logic. A fault in the board. from a power surge, moisture exposure, or a failed component. can freeze the display and the cycle in one position.
Control board failures are harder to confirm at home because they don’t always produce clean multimeter readings. If you’ve tested every other component without success on an electronic model, the control board becomes the primary suspect. Replacement boards range from $80 to $200 or more depending on brand, so professional confirmation before purchasing one is strongly recommended
Quick Troubleshooting Guide
Use this quick reference table to identify the most likely cause before starting a detailed diagnosis.
| Symptom | Most Likely Cause | First Check |
|---|---|---|
| Timer won’t move on Timed Dry | Failed timer motor or timer assembly | Test the timer motor with a multimeter. |
| Timer stuck only on Auto Dry | Dirty or faulty moisture sensors | Clean the sensor bars and inspect the wiring. |
| Dryer runs but produces no heat | Heating element, thermostat, or thermal fuse | Check continuity with a multimeter. |
| Clothes take too long to dry | Restricted airflow or clogged vent | Inspect and clean the complete exhaust vent. |
| Everything tests good but timer still won’t advance | Electronic control board (digital models) | Consider professional diagnosis. |
How to Diagnose a Dryer Timer Not Advancing: Step-by-Step

Work through these steps in order. Don’t skip ahead and don’t replace parts before testing. Use this step-by-step troubleshooting process to identify the exact cause of a dryer timer not advancing problem before replacing any parts.
- Switch to timed dry. If the timer advances on timed dry but not auto-dry, go straight to the moisture sensors.
- Clean the moisture sensor bars with rubbing alcohol. Run a test cycle.
- Inspect the full exhaust vent path from the dryer connection through to the exterior vent cap. Clear any blockages, kinks, or crushed sections.
- Test the thermal fuse for continuity. Replace if blown. and clean the vent first.
- Test the cycling thermostat for continuity at room temperature. Replace if open.
- Test the timer motor with a multimeter. Replace the full timer assembly if the reading falls outside 2,000–3,000 ohms or shows open.
- Test the heating element for continuity. Replace if failed.
- For electronic dryers, if everything above checks out, evaluate the control board and consider a professional diagnostic.
You May Also Like
If you’re troubleshooting a dryer timer that won’t advance, these related dryer repair guides can help you diagnose other common problems, identify the root cause faster, and avoid replacing unnecessary parts.
- Dryer Auto Cycle Not Working? Causes and Easy Fixes
- Dryer Moisture Sensor Problems: Symptoms, Causes, and Fixes
- Dryer Thermal Fuse Failure Symptoms and Replacement Guide
- Dryer Blowing Cool Air Only? Common Causes and Fixes
- 7 Reasons Your Dryer Clothes Are Still Damp After a Cycle
- Dryer Not Turning On But Has Power? Here’s What to Check
A Word on Safety
Always disconnect the dryer from power before removing any panels or testing internal components. If you have a gas dryer, shut off the gas supply as well before opening the cabinet. These steps are non-negotiable regardless of how straightforward the repair looks
If you’re not comfortable working around electrical components, or if your dryer is still under warranty, calling a qualified appliance technician is always the right call. A professional can work from wiring schematics and confirm the fault quickly without guesswork
For additional dryer safety recommendations, review the official guidance provided by the U.S. Consumer Product Safety Commission (CPSC) before performing appliance repairs.
When to Call a Technician
Many dryer timer problems can be diagnosed and repaired at home using basic tools. However, some issues require professional testing and repair to avoid unnecessary part replacement or potential electrical hazards.
- The dryer has a burning smell, visible wire damage, or signs of overheating.
- The timer still does not advance after the timer motor, cycling thermostat, heating element, thermal fuse, and moisture sensors have all tested good.
- Your dryer uses an electronic control board and no obvious fault can be identified.
- You are uncomfortable using a multimeter or working with electrical components.
- The appliance is still covered under the manufacturer’s warranty.
Tip: If multiple components appear to have failed at the same time, schedule a professional diagnosis before purchasing replacement parts. This can help prevent unnecessary expenses and ensure the correct repair is made the first time.
Final Thoughts
A dryer timer not advancing doesn’t mean your dryer is finished. In the vast majority of cases, the problem traces back to one component .and it’s usually something as simple as a dirty moisture sensor, a clogged exhaust vent, a failed cycling thermostat, or a blown thermal fuse. Work through the diagnostic steps in the right order, test before you replace, and you’ll have your dryer running normally again without unnecessary expense.
Start simple. Test methodically. And don’t replace the timer until you’ve ruled out everything else
About the Author
Muhammad Khalid
Muhammad Khalid is the founder of FixAppLab, where he publishes practical appliance troubleshooting guides designed to help homeowners diagnose and solve common problems with dryers, refrigerators, and washing machines. Every article is carefully researched, written in plain language, and structured to provide accurate, step-by-step repair information that readers can easily follow.
His goal is to make appliance repair easier by explaining technical issues in a simple, user-friendly way while following clear editorial standards focused on accuracy, helpfulness, and long-term reliability.


Comments