How to Fix Evaporator Fan in Fridge
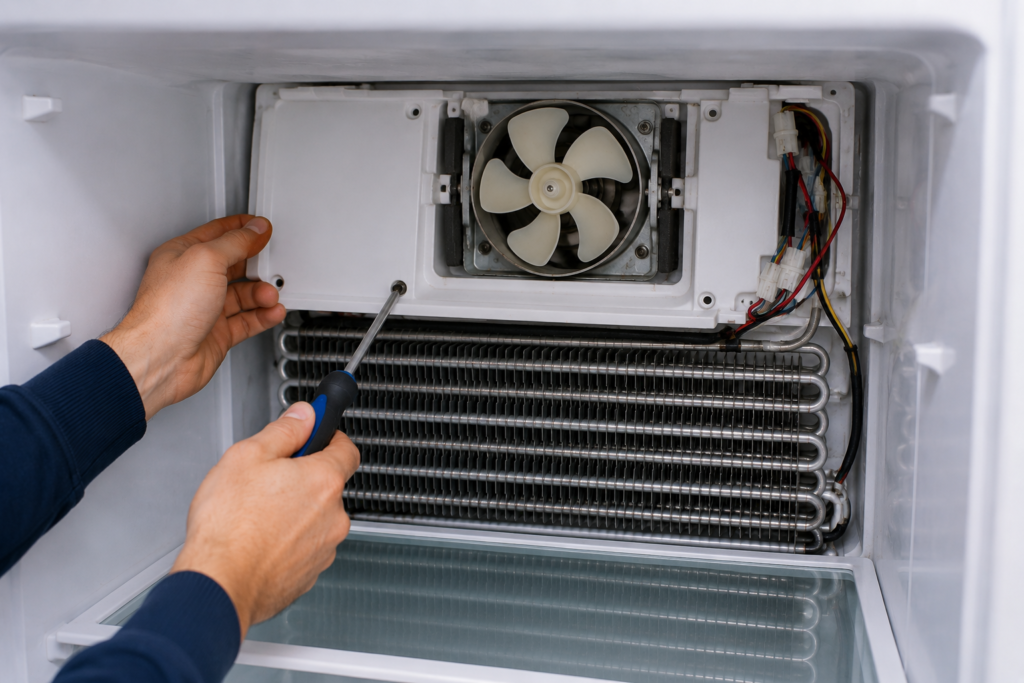
To fix an evaporator fan in a fridge, start by unplugging the unit and removing the rear freezer panel to access the fan. Check for ice blocking the blades or a burned-out motor, then clear the obstruction or replace the motor with a compatible part. Most homeowners can complete this repair in under two hours with basic tools.
If your refrigerator has stopped cooling properly. especially if the freezer still feels cold but the fresh food section is warm. a failing evaporator fan is one of the first things to check. This small but hardworking motor is responsible for circulating cold air throughout the entire refrigerator. When it quits, your groceries pay the price.
The good news? Knowing how to fix evaporator fan in fridge problems is a realistic DIY repair for most homeowners. You do not need professional training or specialized equipment. With the right part, a basic set of tools, and the step-by-step process in this guide, you can diagnose the problem accurately and have your refrigerator running normally again. often the same day
Quick Key Takeaways
- A faulty evaporator fan often causes a warm refrigerator while the freezer remains cold.
- Always unplug the refrigerator before removing the freezer panel.
- Ice buildup can block the fan even when the motor is still working.
- Test the fan motor with a multimeter before buying a replacement.
- Most evaporator fan motor replacements can be completed in under two hours.
Table of Contents
What Does the Evaporator Fan Actually Do?
The evaporator fan sits inside the freezer compartment, tucked behind the rear interior panel. Its job is to pull air across the evaporator coils. where the refrigerant absorbs heat and produces cold air. and then push that chilled air through vents into both the freezer and the refrigerator section.
Think of it as the circulatory system of your refrigerator. Without it, cold air never travels beyond the coils. The freezer often stays cold on its own because of its proximity to the coils, but the fresh food compartment depends entirely on that circulated air. Once the fan stops working, the fridge section warms up fast.
Because this fan runs almost continuously whenever the compressor is operating, it naturally experiences more wear than most other components. That makes it one of the more common parts to fail over time. but also one of the more straightforward to replace

What You Will Need Before You Start
Gathering your tools and the replacement part before you begin makes the whole repair smoother and faster. Here is what to have ready:
Tools:
- Phillips head and flathead screwdrivers
- Nut driver set (1/4″ and 5/16″ sizes cover most refrigerator models)
- Needle-nose pliers
- Digital multimeter
- Hairdryer or heat gun (only needed if you find ice buildup)
- Towels and a shallow pan to catch meltwater
Parts:
- Replacement evaporator fan motor matched to your refrigerator’s make and model
To find the right motor, locate the model number sticker inside your refrigerator. typically on the upper interior wall or along the door frame. Use that exact number when searching for a compatible replacement part online or at a local appliance parts store. This matters more than it might seem: two fans can look nearly identical but have different shaft diameters, wiring configurations, or rotation directions
Safety Note
Disconnect power before opening any refrigerator panels. Never use sharp tools to remove ice from evaporator coils, as puncturing a refrigerant line can cause expensive damage. Wear work gloves to protect your hands from sharp metal edges inside the freezer compartment.
How to Fix Evaporator Fan in Fridge: 9 Easy DIY Repair Steps

Step 1: Unplug the Refrigerator First
Always disconnect power before working on any internal components. Unplug the power cord from the wall outlet. If your refrigerator is hardwired, flip the circuit breaker. This is non-negotiable. never work inside a live appliance.
Step 2: Clear Out the Freezer
Remove all food and store it in a cooler with ice. Pull out every shelf, drawer, and ice maker bin. You need clear, unobstructed access to the rear wall of the freezer compartment.
Step 3: Remove the Rear Freezer Panel
The evaporator fan assembly lives directly behind the interior rear panel of the freezer. This panel is typically secured with four to six screws. often a mix of Phillips head and hex head fasteners. Remove them all and keep them somewhere they will not roll away.
Once the screws are out, pull the panel gently away from the wall. In many refrigerators, wiring harnesses are clipped to the back of the panel or routed along its edges. Disconnect any connectors carefully before setting the panel aside on a flat surface.
If you find heavy ice buildup around the coils or fan: Stop here and defrost before continuing. Run a hairdryer on a low setting over the ice, or simply leave the refrigerator unplugged with the freezer door open for six to eight hours. Lay towels on the floor and place a shallow pan inside to catch water. Never chip at ice with a screwdriver or knife. puncturing a refrigerant line is an expensive and potentially hazardous mistake.
Step 4: Inspect the Fan Assembly
With the panel removed, you can see the evaporator coils and the fan motor housing. Take a moment to look carefully before assuming the motor needs replacing.
Check for:
- Cracked or chipped fan blades
- Ice packed around the blade or motor housing
- Scorched, melted, or frayed wiring near the motor
- A blade that spins too freely (indicating worn bearings) or will not move at all
Try spinning the blade manually with your finger. A healthy motor will have slight resistance. If the blade spins with absolutely no resistance, the bearings are shot. If it will not spin at all, ice or a seized motor is the likely cause.
Step 5: Test the Motor With a Multimeter
If the blades look undamaged and there is no ice in the way, test the motor electrically before ordering a replacement. This step saves you from buying a part you may not need.
Set your multimeter to measure resistance (ohms). Disconnect the motor’s wiring harness and touch the probes to the two main motor terminals. A working evaporator fan motor will typically show a resistance reading somewhere between 20 and 400 ohms. the exact range varies by model, so check your manufacturer’s documentation if you want to confirm the spec for your unit.
- Infinite resistance (OL or no reading): The motor winding is open. The motor is dead and must be replaced.
- Zero resistance: The winding is shorted. Also replace the motor.
- A reading within the normal range: The motor itself may be fine. look at the wiring harness or control board for the fault.
Step 6: Remove the Old Fan Motor
The motor is fastened to a mounting bracket inside the freezer cavity, usually with two to four screws. Remove them and slide the motor out of the bracket.
Before disconnecting anything further, take a photo of how the wiring is routed and how the fan blade sits on the motor shaft. You will replicate this when installing the new motor, and a quick reference photo prevents confusion.
Remove the fan blade from the shaft. it typically pulls straight off, though some models use a small retaining clip. Set the blade aside to transfer to the new motor
You May Also Like
If you are troubleshooting an evaporator fan, weak airflow, or a refrigerator that is not cooling properly, these related repair guides can help you identify the problem faster:
Step 7: Install the New Evaporator Fan Motor
Slide the fan blade onto the new motor shaft and seat it securely. The blade orientation matters .refer to your photo if you are unsure which way it should face.
Place the new motor into the mounting bracket and fasten it with the screws. Route the wiring in the same path as the original and reconnect the harness. Give the blade a gentle spin by hand to confirm it moves freely without catching on any surrounding components.
Step 8: Reassemble the Freezer Panel
Reposition the rear panel and reconnect any wiring harnesses or ground clips that attach to it. Reinsert all panel screws and tighten them snugly. firm enough to hold, but not so tight that you crack the plastic mounts. Slide all shelves, drawers, and the ice maker bin back into place.
Step 9: Restore Power and Monitor
Plug the refrigerator back in. Within a minute or two, press the freezer door switch to confirm the fan activates. You should hear a smooth, quiet hum. no grinding, no rattling.
Give the refrigerator four to eight hours to return to its normal operating temperatures before making any judgments. A properly functioning fridge should stabilize at 35–38°F in the fresh food section and 0°F in the freezer within that window
Common Mistakes to Avoid
- Replacing the fan motor without checking for ice blockage first.
- Ordering the wrong replacement motor instead of matching the refrigerator model number.
- Forgetting to reconnect the wiring harness securely.
- Installing the fan blade in the wrong direction.
- Judging cooling performance before giving the refrigerator enough time to stabilize.
When Ice Was the Real Problem (Not the Motor)

If defrosting the coils solved the immediate issue. the fan blade was simply frozen in place. your repair job is not quite done. Defrosting is a fix for the symptom, not the cause.
Ice builds up in a freezer for two main reasons:
- A failed automatic defrost system. The defrost heater, thermostat, or timer is not working, so frost accumulates on the evaporator over time until it eventually jams the fan blade. This tends to show as frost concentrated on the back wall of the freezer specifically.
- A damaged door gasket. A cracked or loose door seal lets warm, humid air sneak into the freezer continuously. That moisture freezes on contact with the cold coils, building up much faster than the defrost system can handle.
After your defrost, monitor the freezer over the next 24 to 48 hours. If heavy frost returns within that window, one of these underlying issues is at play and will need to be diagnosed separately. Ignoring it means you will be back to a jammed fan motor within days.
(If you suspect a defrost system fault, check our related guide on refrigerator defrost system troubleshooting.)
Simple Maintenance Habits That Prevent Fan Problems
Once you have completed the repair, a few easy habits can significantly extend the life of the new motor and keep the whole refrigerator running well.
Check door gaskets every six months. Run your hand around the door seal when the fridge is closed. If you feel cold air escaping, or if the gasket looks cracked or compressed, replace it. A leaking seal is one of the leading causes of recurring ice buildup and fan failure.
Avoid overpacking the freezer. Crowding the freezer restricts airflow around the fan and vents, forcing the motor to work harder than it should. Leave space for air to circulate freely.
Vacuum the condenser coils once a year. Dirty condenser coils make the entire refrigeration system work harder, which puts indirect stress on the evaporator fan. The coils are usually located underneath the fridge or along the back — a vacuum with a brush attachment handles the job in minutes.
Act on unusual noises early. A faint grinding or chirping from inside the freezer is worth investigating before it escalates. Catching a worn bearing early. before the motor seizes completely. often means the difference between a quick fix and a full cooling failure with a freezer full of spoiled food
When to Stop DIYing and Call a Technician
This repair is well within reach for most homeowners, but there are situations where calling a professional is the smarter move.
Consider bringing in a technician if:
- The evaporator coils refreeze completely within 24 hours of defrosting. this points to a defrost heater or thermostat failure that requires deeper diagnosis
- The compressor is not running at all, which suggests a larger sealed-system issue
- You notice an oily residue around the coils or a faint chemical smell, both signs of a refrigerant leak that must be handled by a certified technician with proper equipment
- Your refrigerator is 15 or more years old and is experiencing multiple issues simultaneously. at that point, the repair cost may exceed the appliance’s remaining value
A good technician can run a full diagnostic quickly and help you decide whether the repair makes financial sense
Final Thoughts
Knowing how to fix evaporator fan in fridge is one of those practical home repair skills that pays for itself the first time you use it. A replacement motor is affordable, the repair itself is straightforward, and the result. a fully cooling refrigerator. is immediate and satisfying.
The evaporator fan may be tucked away behind a panel where you never think about it, but it is doing important work every time your compressor runs. Treat it well: keep the freezer from getting overpacked, address frost buildup before it becomes a problem, and listen to the sounds your refrigerator makes. Small signs caught early almost always mean simpler, cheaper repairs.
Follow the steps in this guide, take your time with each one, and you will have a quietly humming, properly cooling refrigerator back in service well before the day is done.
About the Author
Muhammad Khalid
Muhammad Khalid is the founder of FixAppLab, where he publishes practical appliance troubleshooting guides designed to help homeowners diagnose and solve common household appliance problems. His articles focus on refrigerators, washing machines, dryers, and other major home appliances using easy-to-follow, step-by-step repair methods that prioritize safety, accuracy, and real-world solutions.
Explore More Appliance Repair Guides
Every guide published on FixAppLab is reviewed for clarity, accuracy, and practical usefulness. We regularly update our content to reflect current appliance troubleshooting methods and best practices.


Comments