9 Common Dryer Control Board Problems and How to Fix Them
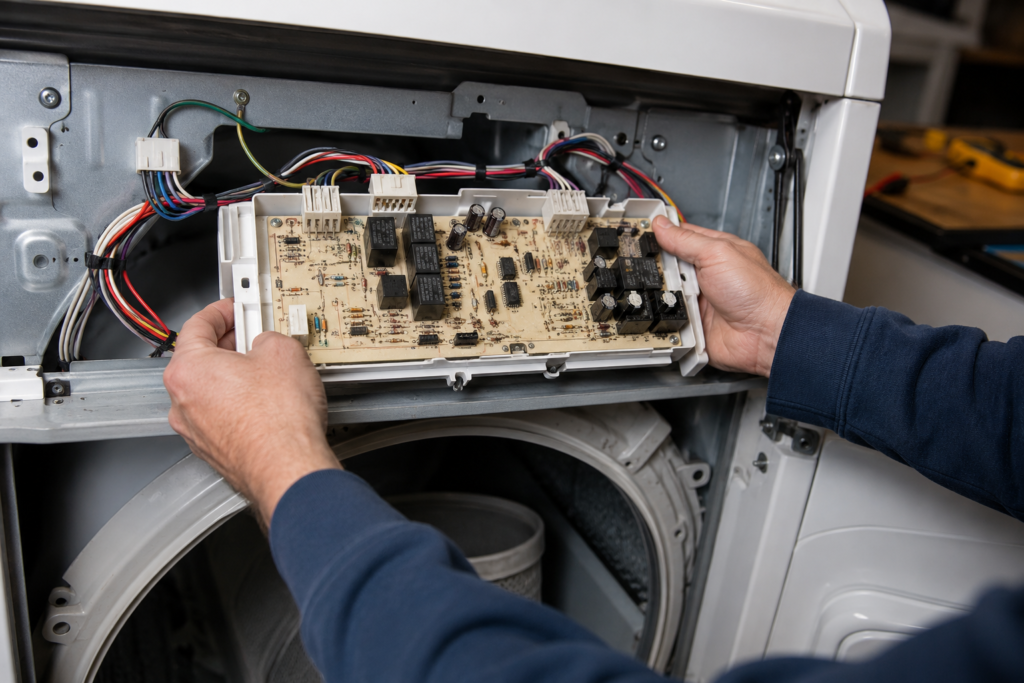
When your dryer suddenly stops responding to the touchpad, refuses to start a cycle, or shuts off in the middle of drying, the cause is often traced back to one part: the control board. Dryer control board problems are among the most frustrating appliance issues to deal with because the symptoms can look like almost anything else. a dead motor, a bad door switch, a blown fuse. before you narrow it down to the board itself. Understanding how this component works, what causes it to fail, and how to test it properly can save you a costly service call or an unnecessary appliance replacement.
The good news is that most dryer control board problems follow a predictable pattern once you know what to look for, and diagnosing dryer control board problems doesn’t require professional-grade tools. This guide walks through what the board actually does, the warning signs that point to it, how to rule out simpler causes first, and how to decide between a repair and a full replacement
Table of Contents
What the Control Board Actually Does
Think of the control board as the decision-making center of your dryer. Every time you press a button, turn a dial, or select a cycle, that input travels to the board, which then tells the motor, heating element, timer, and sensors exactly what to do and when. It manages heat regulation, cycle timing, buzzer alerts, and safety cutoffs.
Because so many functions run through this single component, dryer control board problems tend to produce symptoms that ripple across the entire machine rather than staying isolated to one function. A single failed relay or corroded connection can affect heating, timing, and startup all at once, which is exactly why these issues are so often misdiagnosed as something else.
Most modern dryers use an electronic board packed with relays, capacitors, and a microprocessor, all mounted on a circuit board tucked behind the control panel. Older or more basic models may use a simpler electromechanical timer instead, but the diagnostic approach is similar: confirm the board is receiving power, confirm it’s sending power out correctly, and look for physical signs of failure in between.
Common Symptoms of Dryer Control Board Problems
Not every dryer issue points to dryer control board problems, but certain patterns show up again and again when this part starts to fail. Watch for:
- A touchpad or display that doesn’t respond at all, or responds inconsistently
- A dryer that starts a cycle but stops mid-way for no clear reason
- A display that flickers, dims, or goes completely blank
- Cycles that run out of sequence or skip steps entirely
- A complete failure to power on, even though the drum light still works
That last point is actually one of the more useful clues you can find. If the interior light comes on normally but the control panel stays dark, you know power is reaching the cabinet — which shifts suspicion toward the control panel wiring, the door switch, or the board itself, rather than the outlet or main power supply. Working through symptoms this way, one possibility at a time, is central to solving dryer control board problems efficiently instead of guessing and swapping parts at random
Quick Troubleshooting Guide
| Symptom | First Component to Check |
|---|---|
| Dryer won’t start | Door switch & thermal fuse |
| Display is blank | Incoming power & control board |
| Stops during cycle | Control board relays & wiring |
| Buttons not responding | Control panel ribbon cable |
Ruling Out the Simpler Causes First
Before assuming the board itself is bad, it pays to check a few components that commonly mimic dryer control board problems. Two in particular are worth testing first, since both are quick, inexpensive, and rule out the most common false alarms:
- The door switch. If it’s stuck or worn, the dryer may never receive the signal to begin a cycle, even though the board is functioning perfectly. Test it for continuity with a multimeter. this takes just a few minutes.
- The thermal fuse. If the board has power and appears to be working, but the dryer won’t heat or won’t start at all, a blown thermal fuse can produce symptoms nearly identical to genuine dryer control board problems. These fuses are cheap and simple to test, so checking one first can save you from replacing an expensive board unnecessarily.
Wiring connections deserve attention too. Loose or corroded connectors, especially where ribbon cables plug into the board, can cause exactly the kind of intermittent, hard-to-reproduce faults that make control board issues so frustrating to chase down. A dryer that works fine for a few loads and then goes unresponsive until it’s unplugged and reset is a textbook sign of a loose or degraded connection somewhere along that path
You May Also Like
If you’re troubleshooting dryer control board problems, these related repair guides can help you diagnose and fix other common dryer issues.
How to Test the Control Board Itself

Once the door switch, thermal fuse, and wiring have been ruled out, it’s time to look directly at the board.
Step 1: Unplug the dryer completely. This isn’t optional. dryers carry lethal voltage even when powered off at the panel, so always disconnect power before opening anything up.
Step 2: Do a visual inspection. Remove the necessary covers to access the board and look closely for burn marks, bulging or leaking capacitors, cracked solder joints, or any discoloration that suggests heat damage.
Step 3: Test voltage with a multimeter. If nothing is visible to the naked eye, set your meter to AC voltage and check that the board is receiving the expected incoming voltage, typically around 120V, and that it’s properly distributing power out to the heating element and motor relays when a cycle is selected. If voltage arrives at the board but never reaches those components, that’s a strong sign the board has failed internally, even without visible damage.
This is one of the trickier aspects of dryer control board problems: the failure is often electrical rather than physical, so a multimeter tells you far more than your eyes ever will. Error codes, where your dryer model supports them, can also speed up diagnosis considerably. checking your owner’s manual for the meaning behind a flashing code or beep pattern can point directly to a board-related fault instead of leaving you to test every component in sequence
Safety Note
Always disconnect the dryer from its power source before removing the control panel or touching internal wiring. Electronic control boards can be damaged by static electricity, so avoid touching exposed circuit components unnecessarily. If you’re uncomfortable working around electrical parts or using a multimeter, it’s safer to stop and contact a qualified appliance technician.
Repair or Replace?
Not every control board failure requires a full replacement, and knowing which category yours falls into can save real money.
Repair is usually the right call when you find:
- Corroded or oxidized contacts that clean up easily
- Cracked or weak solder joints that can be reflowed with a heat gun or soldering iron
- Intermittent unresponsiveness that comes and goes — working fine after being unplugged, then failing again after a few loads — which is often caused by exactly this kind of weak connection
Replacement is the more reliable path when you find:
- Burned-out relays
- A cracked circuit trace
- A board that shows no signs of life no matter what you test
Trying to repair severe board damage often leads to a repeat failure down the line, whereas a new board resets the clock on that component entirely. When ordering a replacement, always match the exact part number for your dryer model rather than assuming a similar-looking board from another model will work. even small revisions in board design can affect compatibility.
Whichever route you choose, document your work before you start. Take clear photos of every wire connection before disconnecting anything, since control boards often have a dozen or more connectors that look nearly identical but serve very different functions. This single habit prevents the vast majority of installation mistakes people make when tackling dryer control board problems on their own.
Step-by-Step Approach to Fixing the Issue

Working through dryer control board problems in a logical order saves time and avoids unnecessary part swaps:
- Unplug the dryer and leave it disconnected for five to ten minutes. This simple reset clears many temporary fault codes and glitches without requiring any disassembly at all.
- If the issue persists, check the door switch and thermal fuse. Both are quick, inexpensive tests that rule out the most common false positives.
- Remove the control panel carefully, photographing the wiring as you go, and inspect the board visually for damage.
- Test voltage in and voltage out with a multimeter to confirm whether the board is actually processing and distributing power correctly.
- Based on what you find, clean and repair minor issues like corrosion and weak solder joints, or source a replacement board that matches your exact model number.
- Reassemble carefully using your reference photos, then run a full test cycle to confirm the repair actually resolved the problem rather than just masking it temporarily
Common Mistakes to Avoid
- Replacing the control board before testing the thermal fuse or door switch.
- Forgetting to unplug the dryer before opening the control panel.
- Installing a replacement board with the wrong model or part number.
- Ignoring loose wiring connectors that can mimic board failure.
- Skipping a complete test cycle after completing the repair.
Preventing Future Control Board Failures

While not every failure can be avoided, a few habits meaningfully reduce the odds of running into dryer control board problems again. and most of them cost nothing beyond a little regular upkeep:
- Clean the lint filter after every single load to keep heat and moisture from building up around sensitive electronics
- Make sure your dryer has proper ventilation, since prolonged heat exposure is one of the leading causes of capacitor and solder joint failure
- Use a surge protector on the dryer’s power supply to shield the board from voltage spikes, a common but often overlooked trigger for sudden electronic failures
- Avoid chronically overloading the drum, which strains the motor and, by extension, the board that has to manage that load
When to Call in a Professional
Some situations genuinely call for a trained technician rather than a DIY fix. It’s worth bringing in professional help if the repair involves intricate soldering work you’re not comfortable with, if your dryer is still under manufacturer warranty, or if you’ve already attempted a fix and the same symptoms keep returning. A technician with proper diagnostic equipment can often confirm dryer control board problems in a fraction of the time it takes to test everything manually, and they can source OEM-matched replacement parts with less risk of compatibility issues.
Ultimately, most dryer control board problems follow a predictable diagnostic path: rule out the door switch and thermal fuse, inspect the board visually, test voltage with a multimeter, and then decide between a targeted repair or a full replacement based on what you find. Approaching the issue methodically, rather than jumping straight to a parts swap, is what separates a quick, affordable fix from an expensive guessing game.
About the Author
Muhammad Khalid
Muhammad Khalid is the founder of FixAppLab, where he publishes practical appliance troubleshooting guides focused on washing machines, dryers, and refrigerators. His goal is to simplify complex repair topics into clear, step-by-step solutions that help homeowners diagnose common appliance problems safely and confidently.
Follow FixAppLab:


Comments